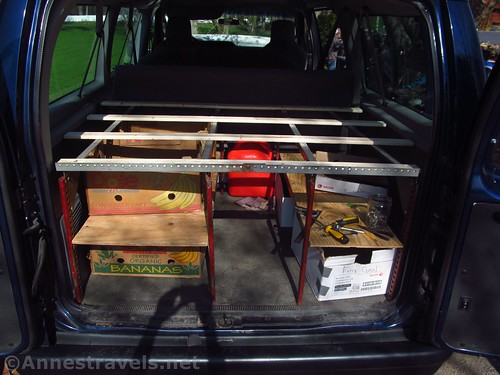
The mostly-finished shelving unit in the back of the van – the only thing missing is the top deck! (Well, that and most of the boxes!)
Well, we got a new van! At least, it’s new to us 🙂 After 18 years of owning and loving our Dodge Ram 1500s, it was time for something different, not because we didn’t want another Dodge (did I mention that we loved our Dodge vans?), but because any van we could get would be at least 16 years old (Dodge stopped making vans in 2002 in favor of Sprinters, which was not what we wanted).
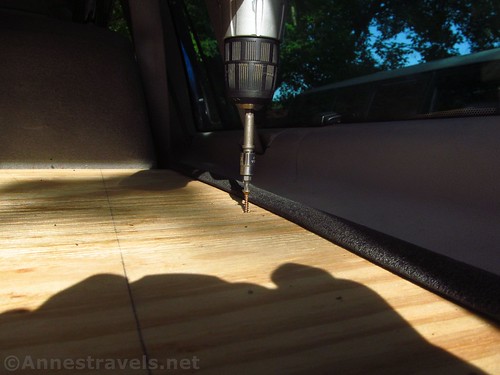
There’s the top deck (and a power drill putting in the screws to hold it in place)
The problem with the new Ford E150 is that it’s a very different size than the Dodges. Even the E150 (the smallest of the Ford Econoline series) is significantly longer than the Ram 1500. That means more space (yay!) but it also meant we would have to replace our old shelving unit for storing boxes in the back (not the worst thing since the old one has had a few too many redesigns and was beginning to fall apart).
Pulling out the right half of the shelving unit after the trip
And so we set about designing and building a shelving unit with less than six weeks until we would be leaving on a cross-county trip.
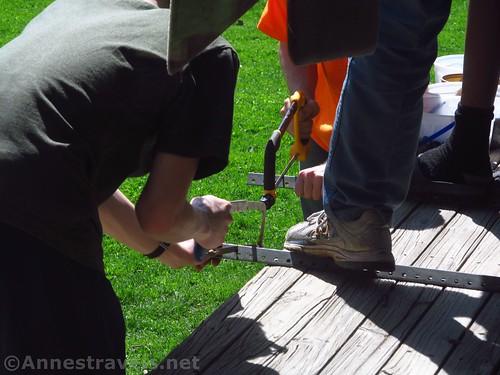
Cutting angle iron – two at a time!
Top on our list of priorities were: a deck on top for sleeping on and using for sleeping bag storage during the day; shelves that would fit our boxes; and a place for the cooler that is easy enough to access that we don’t have to tear the back completely apart when we buy ice to keep the milk cold. I also asked that we have a space for our three 4-5 gallon water jugs. For years they’ve been underfoot in front of the middle bench seat, and I’m a little tired of not having any place to put my feet.
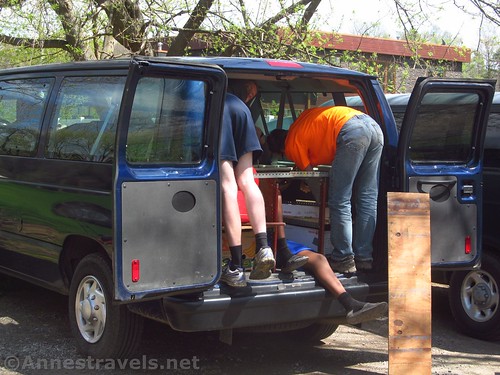
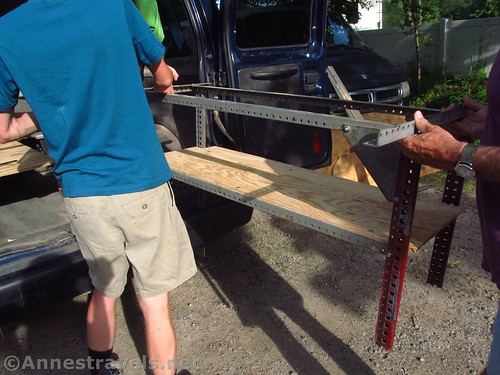
Working inside the van. Those guys are awesome and undeniably amazing!
I’ll make lots of diagrams and let you have at it as best as you can. It’s not a science. In fact, it’s highly custom. Measure twice and check it twice more before you just build this and expect it to fit in your van – 2010 E150 (like ours) or otherwise (note that there was a slight redesign in 2008, so if your van is older than that, double-double check your measurements).
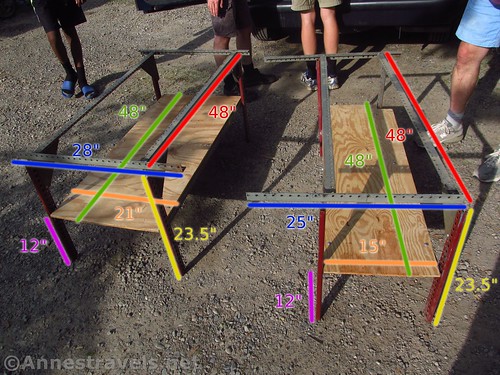
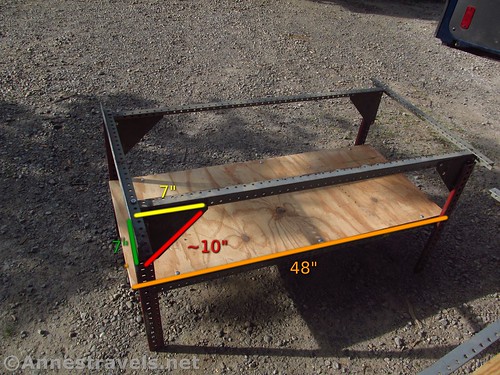
Measurements – the left half of the shelf holds the banana boxes, the right half, paper boxes
The left shelves were made for banana boxes (used to get them at Aldi, but now those have a big hole in the bottom, so we’ve gone to picking them up from time to time at Costco). The dimensions of each box is 20”x15.75”x9.75” (see diagram; note that these are exterior dimensions). We could fit three of them on each shelf for a total of six banana boxes (three on the shelf and three under the shelf sitting on the floor of the van).
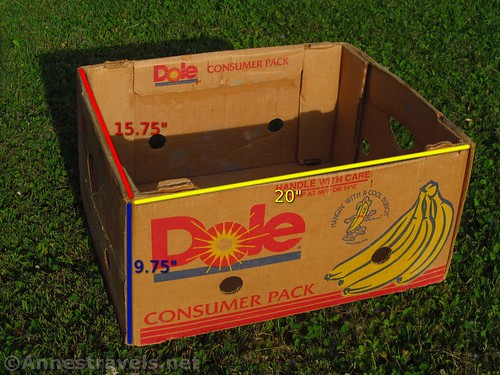
A banana box with dimensions. I think this one came from Aldi; Costco’s usually have a bit more green ink
In the middle we put three water jugs and the cooler (two jugs behind the cooler, next to the back seat; one closer to the door – it’s one way to insulate the cooler and keep it cool so the ice lasts longer!) It was great to not have the jugs underfoot, and I always keep a smaller (1+ gallon) jug and extra water bottles full of water up front, so it wasn’t like we couldn’t get to water if we needed it.
More dimensions
Unfortunately, with the cooler and water jugs in the middle, there wasn’t room for more banana boxes on the right. We ended up using 14” paper boxes (dimensions 18”x14.25”x9.5” – see diagram). They didn’t hold up like we wanted, so we’re in the market for plastic boxes in the proper size for the next trip (possibly like this or this
). We used two boxes on each shelf for a total of four paper boxes, and there was a fair-sized space that wasn’t used – at least by the boxes; we stashed all kinds of things there and hoped they didn’t fall out when we opened the door (lol – actually, they did pretty well at staying put, most of the time!)
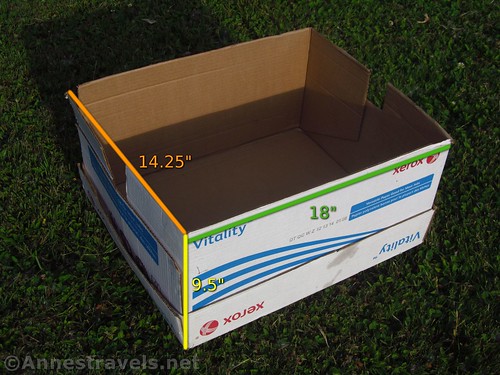
A paper box with dimensions
There is some space left over on the sides, over the wheel wells. We stuffed these with duffle bags full of clothes. That was great until we pulled out the boxes and the duffles slid through the edges, making it impossible to put the boxes back in. Arg. We’ll have to put luan on the edges or something if we want to continue using that extra space over the wheel wells for storage. And since that’s where the clothes go, not to mention the extra library books for the trip home, I expect we’ll be using the luan.
You can see the space between the shelf and the wall in this picture, as well as see the fact that one of the legs is built about 2″ into the shelf to avoid the wheel well.
The shelving unit is made in basically three parts – the left side, the right side, and then the top. Make the left side and the right side separately, lift them into the van, and then you can construct the top on top of the two sides, joining them together with a piece of metal screwed to the angle iron (see below).

The three inch piece of metal that connects the two sides of the shelving unit – there’s another on the opposite side, next to the back seat
The shelves are made out of plywood – the left 48”x21”; the right 48”x15”. Each is constructed using a frame of angle iron (not cheap; we happened to have some from some old shelving). There are gussets (7”x7”) at the top of each frame made of metal – I honestly have no idea where the metal came from, but it’s possible it was in one of my group member’s welding scrap metal bucket. Note that the angle iron frame across the top extends over the ends of the shelves – you’ll be bolting these together using a piece of 3” metal once you get them in the van.
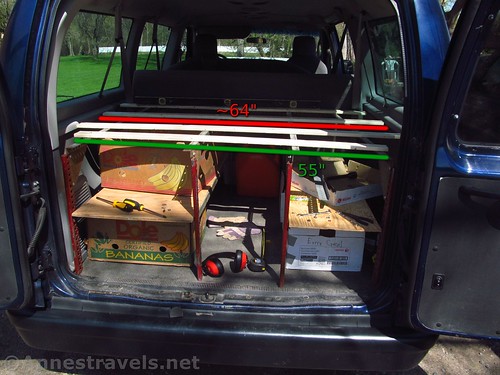
Dimensions of the furring strips that form a base for the top shelf of the shelving unit
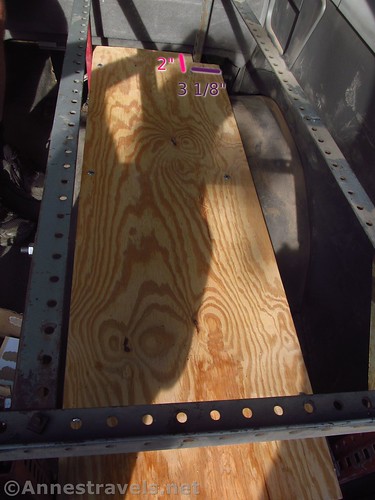
The top is made of furring strips (nice and cheap!) and pieces of plywood. The furring strips are 64” long except for the one by the door, which is only 55” long. You’ll have to figure out exactly where to put the screw holes by where the furring strips hit the plywood and the angle iron. It’s not quite square, especially on the right side. The plywood on top we made out of two pieces; one 64.75”x30” (with a 2”x3 1/8” square (you can’t see it in the photos) taken out of one side to allow an upright post to avoid the wheel well) and the other 64.5”x17” with curves cut out of the edge by the door. And the curves are art more than science – we used a cardboard template, then kept cutting until it fit. As you can see, the two sides of the plywood (right and left curves) aren’t exactly mirrors of each other.
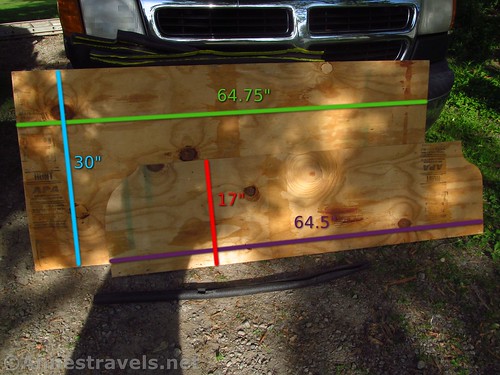
Dimensions of the two pieces of plywood that make up the topmost shelf
After it was all installed, we put foam (like this; it’s supposed to go around pipe and is very inexpensive at hardware stores) on the angle iron to both protect the walls and protect the people who would be sleeping on the top deck. They found the plywood far too hard to sleep on, but a couple foam sleeping pads (such as this one
) fixed that.
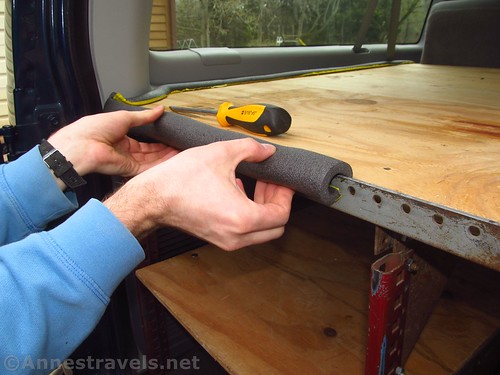
Installing the foam plumbing insulation on the angle iron – the top shelf is finally in place, too!
Overall, I’m very impressed with the design and how easy it was to get the boxes in and out (well, I had to crawl into the van sometimes to get the back ones out, and that was completely impossible when I was standing on a slope about 8” below the parking lot level – I have pictures to prove that we were pulling one of the younger ones back out after they had crawled inside to get something that had fallen out of one of the boxes). But in general it’s a great system and I expect we’ll use it for many years to come!
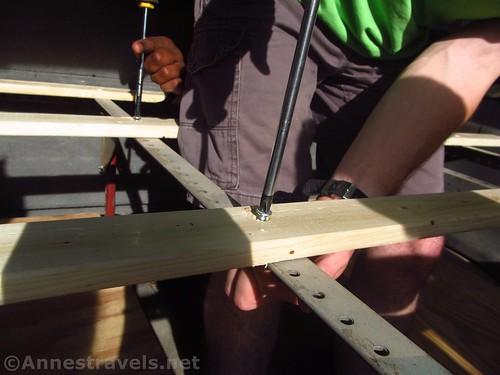
Two screwdrivers screwing!