

In my last post, I started talking about how to make screens to put over the windows of your vehicle to keep out the bugs. In this post, I’ll continue to explain how you can make these bug screens.
Now that you’ve gone shopping, you should have all the supplies you need to make the bug screens:
1. Screening
2. Magnets
3. Thread
(Affiliate links are present on this page.)
To finish the bug screens, you’ll need:
4. A yardstick or tape measure
5. Chalk or some other implement to mark the screening
6. A pair of scissors for cutting the screening and thread
7. A needle

Step 5: Cutting the Screens
First, lay out the screening on a large, open surface—I used a clean, carpeted floor, but if your screens are small enough, a tabletop would also work. Measure out the screens from the measurements you took earlier; mark with the chalk or marking implement. It’s best to mark out all the screens first; this may save the project later if you accidently marked something wrong the first time. It will also show you if you purchased the wrong amount of screening, etc. Once you’ve marked out your screens, cut them out using the scissors. Set aside, but make sure you know which will be used for which window, since likely each window will need different numbers of magnets in different places on the screen.
Step 6: Magnets
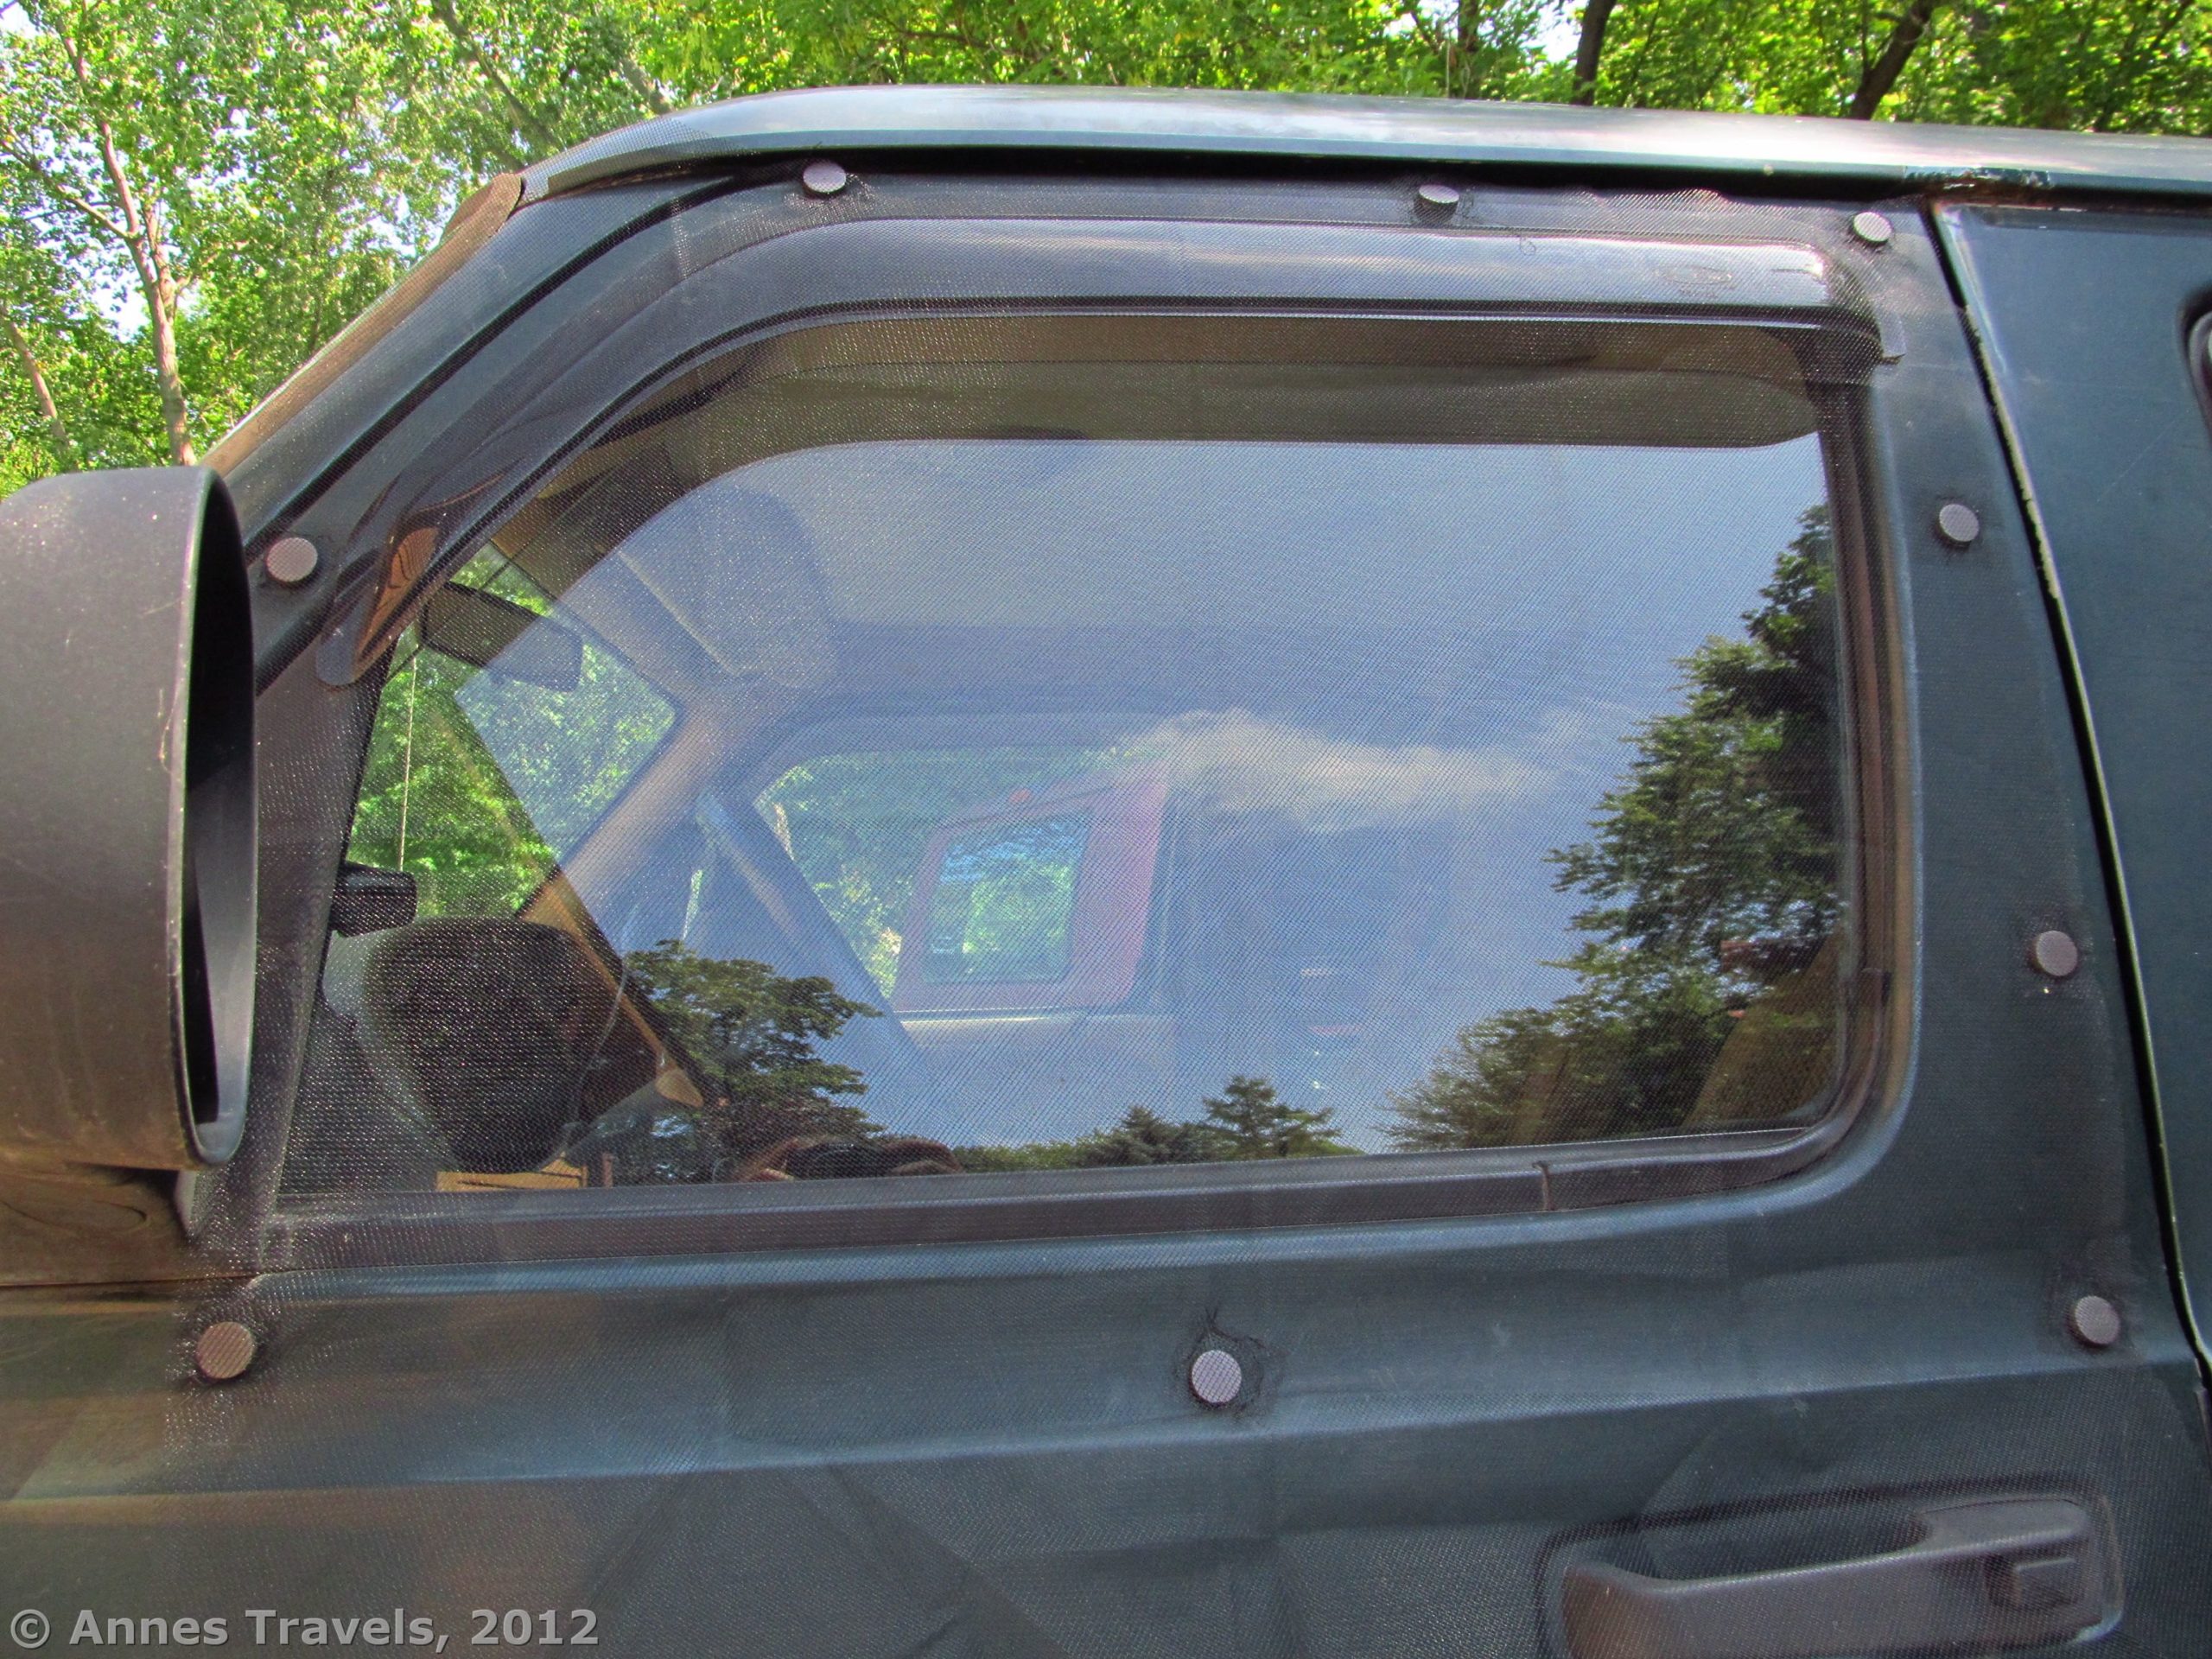
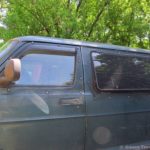
After all the screens are cut out, take them out to your vehicle and double-check how many magnets you will need. Just put the magnets on top of the screening for the moment in the places where they’ll be when the screens are finished. You can refer again to the picture (below) as to how I put magnets on the screens for each window. The point is to make sure there aren’t large holes where bugs could fly in. You won’t make an air-tight seal, but you can place the magnets close enough together to hold the screening close to the body of the vehicle. Mark where each of the magnets will go. By the way, on the flip-out windows, I gave the lower corners a couple twists, then held it in place with a magnet. This helps to hold the screening close to the vehicle’s body.

Now you’ll need to attach the magnets to the screens. To do this, first cut squares out of leftover screening 1” larger than your magnets’ diameter. In other words, if the magnet measures ¾” across, you’ll want 1 ¾” squares of screening. (This refers to round or square magnets…if your magnets are rectangles, add an inch to each dimension and cut rectangles of screening accordingly (a 1”x2” magnet would need a 2”x3” rectangle of screening).) Take one of the magnets and place it on top of the mark on the screen you made earlier. Then take one of the small squares of screening and put it on top of the magnet. Now sew a set of large stitches around the magnet through the two layers of screening, as shown below. (I couldn’t make a knot big enough to not go through the screening, so I left a long tail of thread where I started, then tied the two ends together after I’d sewed all the way around.) Congratulations, your first magnet is sewn on! Repeat with the other magnets and screens.


Step 6: Final Touches
When you’re finished sewing on the magnets, try the screens on the vehicle again. If needed, pull out the stitching around the magnets, reposition, and re-stitch.
Congratulations! Now you can camp in your vehicle without fear of being eaten by the mosquitoes, bugs, and other flying insects that make sleeping nigh unto impossible!
Enjoy!
This week’s featured product!
Need strong magnets that will actually hold your screens to the van? Try these!


6 responses to “Bug Screens/Van Screens, pt. 2”
[…] post is getting long, so I’ll tell you about actually making the screens next week. Go to Part 2 […]
Thank you so much for bringing this to our minds eye. This is a very informative article with a lot of information, good content!
Thanks so much for taking the time to explain this all so beatifully! This was exactly what I hoped to find when I looked online as we are thinking of a four week sleep-in-the-car trip! Thanks to you we might not get eaten alive!
You’re very welcome! Considering how one of my group members entertains herself by watching the mosquitos crawl all over the screens – but unable to come in – after going to bed, I hope these will work just as well for you! We tend to congregate a ways from the van to draw the bugs out, then make a mad dash to bed and close the doors before more than one or two get in with us 🙂
Hi,
Thanks for this info.
An idea for van doors is to have two screens that overlap in the middle by about 30cm with magnets to hold them up and chain sewed into the bottom so it rests on the door sill. The net needs to be just a little longer than the door opening so the chains sit flush with the sill.
The overlaps can be settled so mosquitoes can’t find their way in through there but you can open them up easily enough to get in and out. (If you’ve been to India you will probably have seen these on doors there.,
I guess the magnets need to be quite strong to hold it up when you go in and out.
Sounds like a cool idea, Mak! Let me know if you try it! -Anne