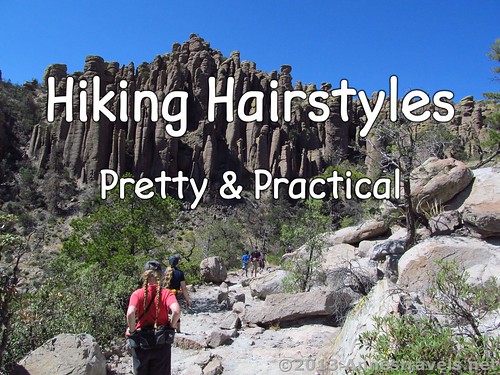
This is a guest post from one of my hiking companions. She’s young, slightly dramatic, and loves pretty things, even in the middle of the wilderness. You can find her top hiking destinations here.
If you have long hair, like me, you’ve simply got to find a way to keep it out of the way and under control when you’re hiking. Long hair that’s falling into your eyes, sticking to the back of your neck because you’re sweaty, etc. just isn’t practical and it certainly won’t enhance your hiking experience. So I’ve compiled a list of my 12 favorite hiking hairstyles for medium to long hair.
Click on the images to make them larger.
(Affiliate links are present on this page.)
12 Hiking Hairstyles that are Pretty & Practical
1. Ponytail
You’ll need: 1 normal-size hair elastic (or scrunchie or hair clip
)
A personal favorite, ponytails keep the hair mainly contained while actually being fairly comfortable for sleeping on (or you can always take them out for sleeping). However they do have two cons – they have a tendency to get a little messy when exposed to high winds, and they also will rest on your pack because the hair won’t have anywhere to go. Directions below.
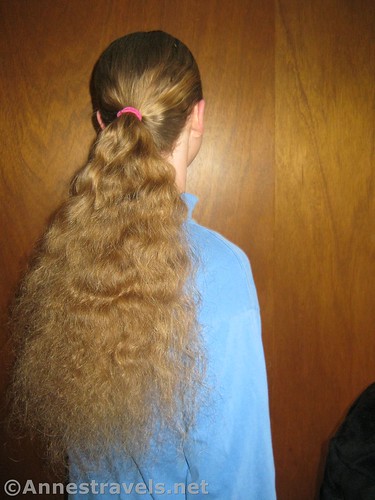
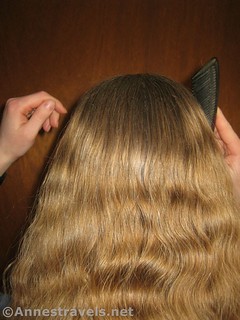
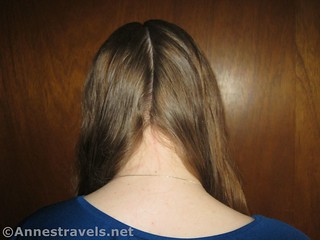
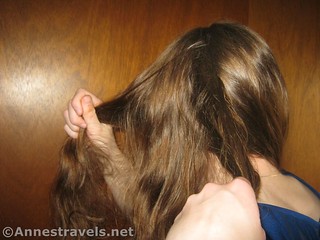
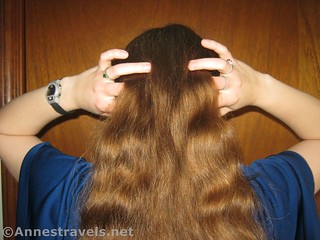
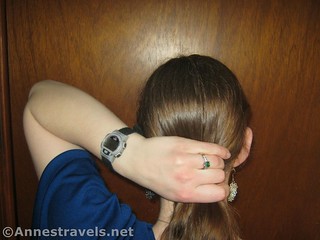
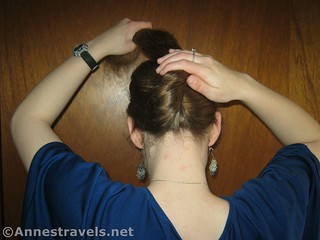
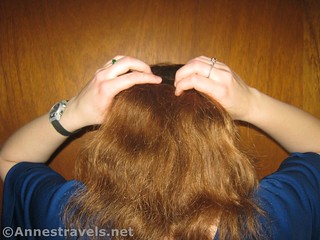
First, comb all your hair back.
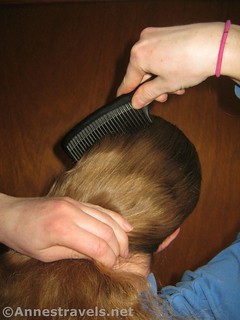
Into one hand…
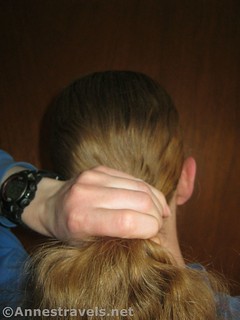
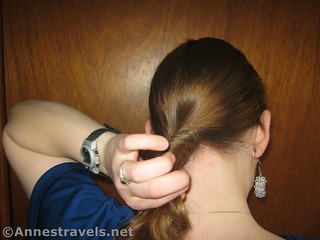
Now put in a hair elastic.

Finished!

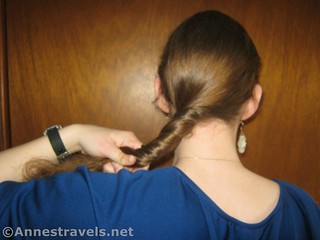
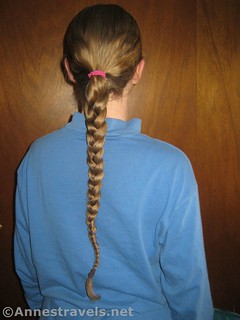
2. Simple Braid
You’ll need: 1 normal-size hair elastic, 1 thin hair elastic
This is a favorite hiking hairstyle. It both contains the hair and makes it easy to brush when you’re done with your hike. Braids stand up fairly well to wind. The one thing that’s not so nice about a single braid is that if you’re carrying a backpack, it doesn’t have anywhere to rest. Braids are also not so comfortable for sleeping on, though Anne does it all the time. Directions here.

3. Two braids.
You’ll need: 2 thin hair elastics
This one is a favorite of West Coast hikers. It is very comfortable for hiking, even with a large backpack because they hang down over your shoulders. One of my group members wears this all the time when hiking, though she complains that it lets her neck get sunburned. This hairstyle will stand up to wind and is also fairly comfortable to sleep on. Directions below:
With a comb, part the hair into two sections and put each section over a shoulder.
Next, take one section of hair…
…and divide it in thirds.
Now braid like a regular braid. It should look like this:

Keep on until it’s the length you want. Secure with a thin hair elastic.

Now repeat on the other side. It should look like this:

Finished!
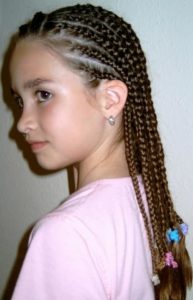
4. Lots of braids / cornrows
You’ll need: Lots of thin hair elastic
This is time-consuming when you first do them up, but they’ll keep even hair that is very fine looking fairly good for days. Each day, you can take one or two braids down and re-braid it. After a few days, you’ll have completely redone your hair! This will stand up to high winds well. If you pull them all to the side, it’s not too bad for sleeping on either. Directions here.
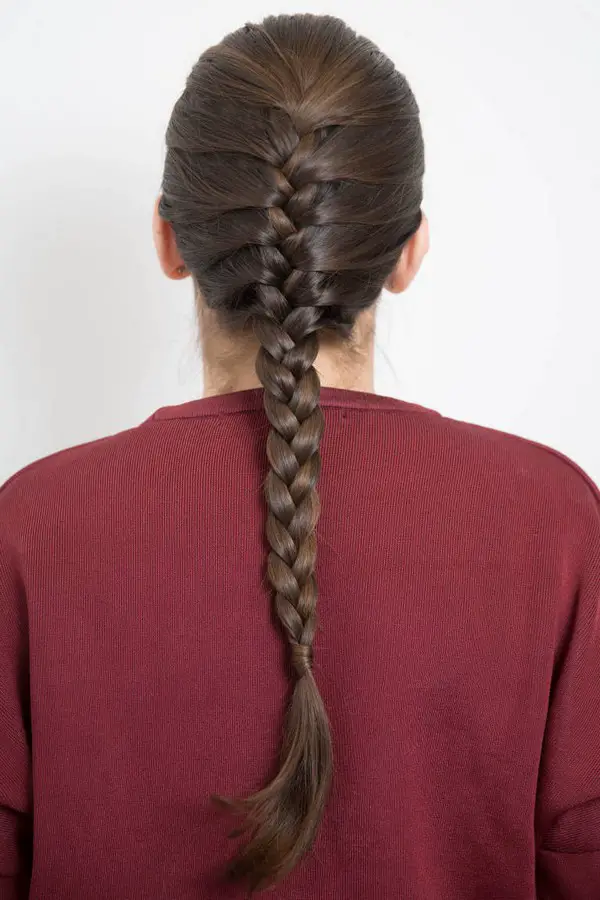
5. French braid
You’ll need: 1 thin hair elastic
Like a simple braid, a French braid will stand up to high winds and is uncomfortable to sleep on (in my opinion – Anne doesn’t seem to mind). But it has the added benefit of keeping the hair on top of your head contained. One major problem is that it takes a long time to put it up. However, that will probably be diminished for the way it looks even after a long day of hiking! Directions here.
You can also do two French braids like this.

6. French Twist with ponytail
You’ll need: 1 good-size hair clip – the clip on mine is about 2.5” wide
If you’re wearing a hat, this hairstyle isn’t quite as comfortable. However, I find that it keeps my hair nicely contained. It stands up to the wind fairly well. The one real problem is that you have to have a clip on-hand. Directions below.
First, smooth all the hair back…
…into a ponytail (see above, but don’t put in the hair elastic).
Now begin to twist the hair…
…down about halfway.
Now take the twisted section and flip it up, as shown.
Now, take a hair clip…
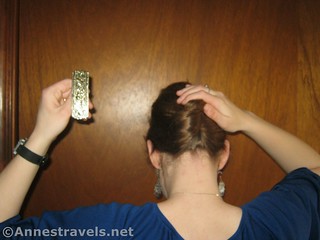
…and put it into the right side of the hair, about halfway up the twisted section, catching both the twisted hair and the hair underneath, next to your head.

Clip the clip shut and straighten it.

Flip the loose hair over the clip. This will probably hide the clip completely.
Smooth it down and…

You’re finished!

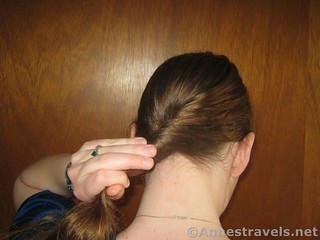
7. Hair elastic twist-up
You’ll need: 1 scrunchie or normal-size hair elastic
This is my own creation. I made it up because I was tired of having to use dozens of bobby pins in my hair and then having it fall down anyway. I find that having something like a hair elastic helps my hair stay in place. So I created this hairstyle as a perfect solution to my hair dilemma. I wear it most of the time when I’m hiking. Directions below.
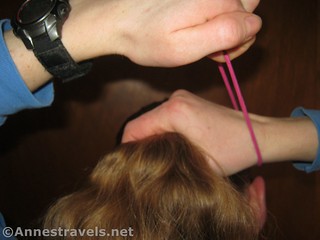
First, smooth back your hair into a ponytail (see above, but don’t put the hair elastic in)
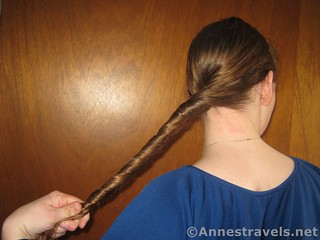
Next, begin to twist the hair…
…until it is twisted down to nearly the end:
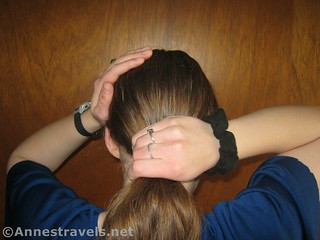
Now, place one or two fingers at the nape of the neck and loop the twisted hair once around fingers, as shown below.
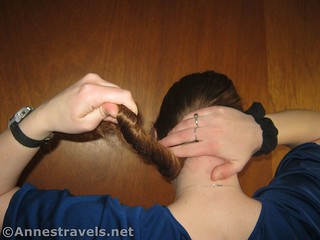
Keeping the first loop secure at the nape of the neck, switch the hand that is holding the top section of hair and loop the remaining hair to create a vertical oval with the hair, like this:
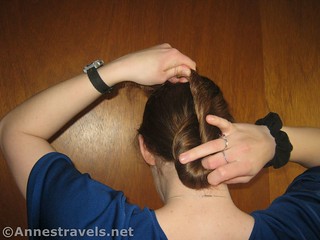
Switch which hand is holding the top of the oval.
Continue pinching the top of the oval and loop remaining hair down, into the center of the oval:
Now grasp hair right around the bottom loop. Make sure your hair elastic (I like big scrunchies) is on the wrist of the hand that is grasping the loop.
Now, with your free hand, grab the hair elastic and pull it around the bottom to the middle of the oval.
Loop the hair elastic around the hair another time or two…
And you’re finished!

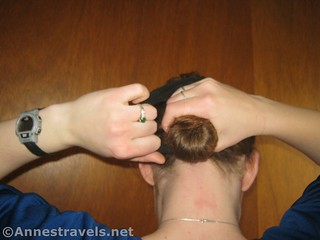
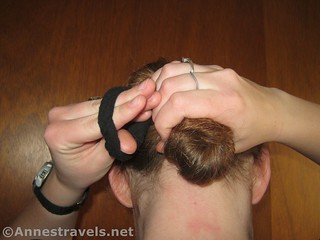
8. Simple Bun
You’ll need: 1 normal-size hair elastic, 4 or more bobby pins or hair pins
Easy, hair containing hiking hairstyle. A con is that it will not stand up to high winds. There have been times that I can remember taking down my hair because the bun was so blown apart. A pro for this hairstyle is that it keeps your hair from resting on your pack. However, it is also terribly uncomfortable for sleeping. Directions here.

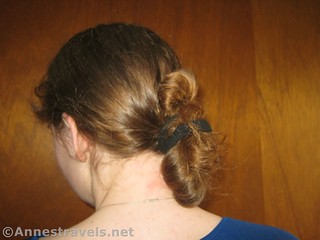
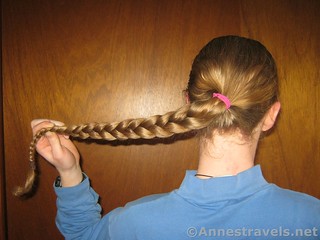
9. Braided Bun
You’ll need: 1 normal-size hair elastic, 1 thin hair elastic, 4 bobby pins
or hair pins
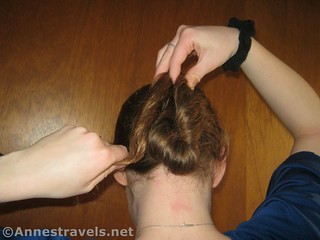
Anne, the creator of this blog, wears these all the time when hiking! It’s very practical and will stand up to high winds very well. She sleeps with this bun in her hair too…I don’t think that sounds very comfortable, but she does it and says it’s like an extra pillow. Directions below.
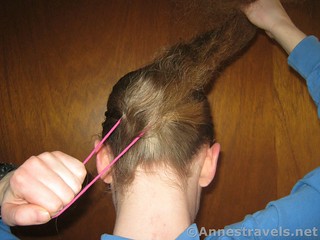
First, braid your hair in one braid and secure it at the bottom and top (see how to make a braid, above).
Now, take the braid and pull it out to the side.
Placing a finger right next to the top hair elastic, begin to loop the braid around the top hair elastic.
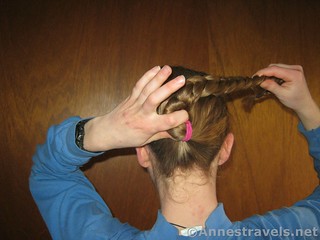
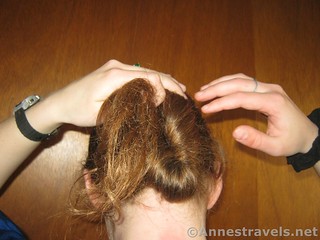
Continue tightly looping the braid around top hair elastic…
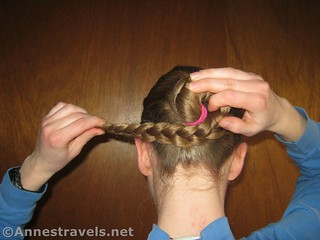
…until you have wrapped all the hair. Once the top hair elastic is wrapped around, keep wrapping around the base of the bun:
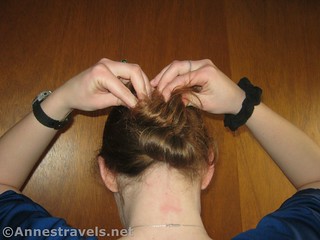
Holding the bun in place with one hand, use the free hand to put a bobby pin into the bun. You will want to put in four: if you imagine that your bun is like a clock face, put the bobby pins in at 2:00, 4:00, 8:00, and 10:00.
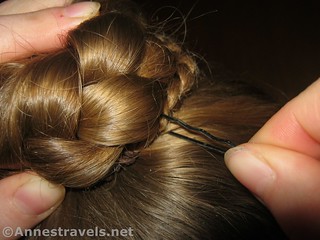
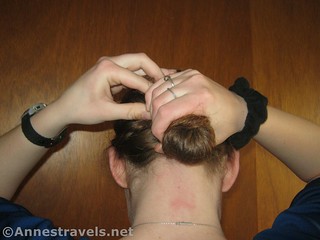
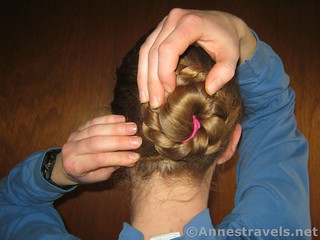
Once you’ve put in the bobby pins…
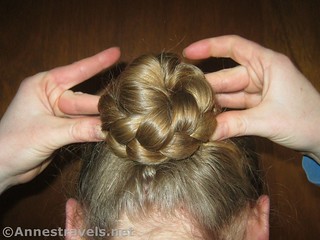
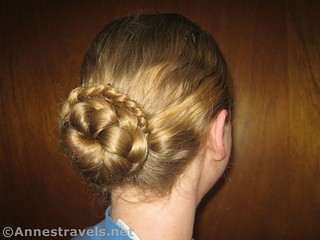
…you’re finished!
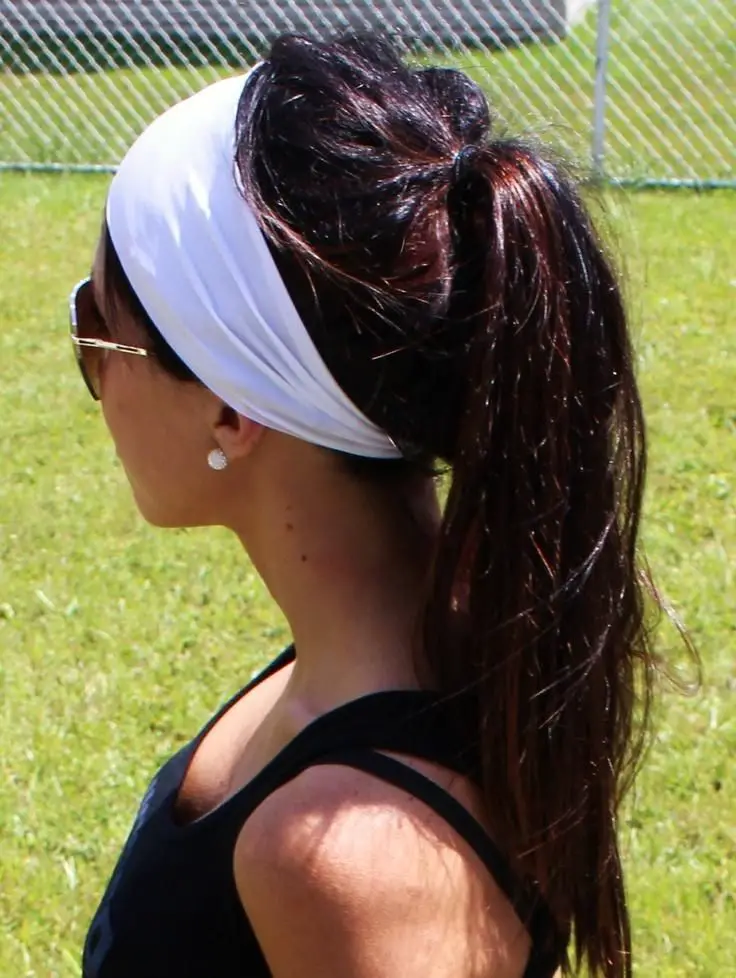
10. Headband
You’ll need: 1 headband. These come in many different styles, from narrow to wide and frilly
.
Headband hairstyles are great for keeping your hair in place. You can do a lot of hairstyles with headbands, including, but not limited to: braids, ponytails, and hair elastic twist-up. In short, any of the hairstyles that I mentioned here you can probably do with a headband. A few examples can be found here.
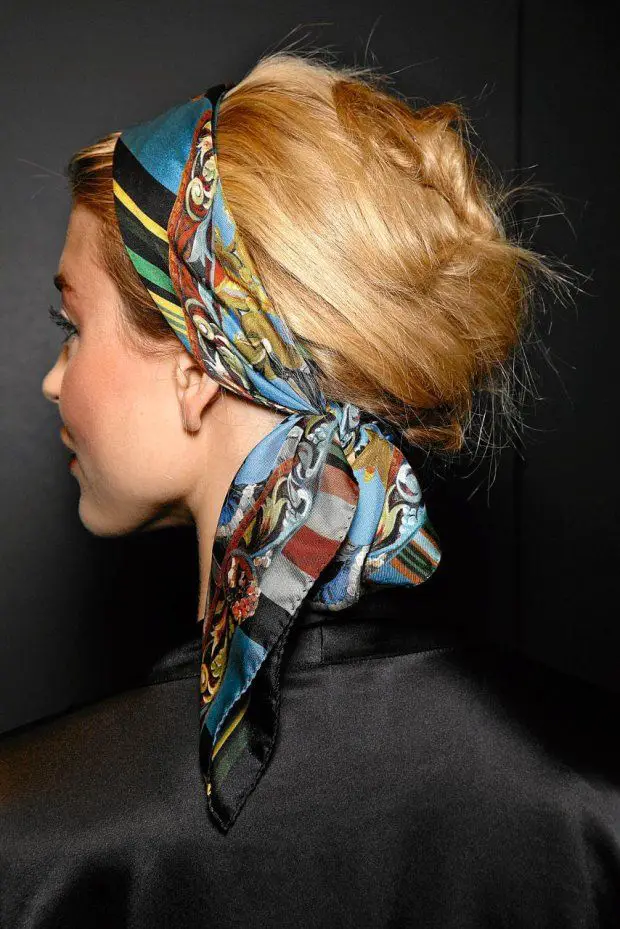
11. Kerchief
You’ll need: 1 square scarf
Like the headband, kerchiefs can be used for a lot of hairstyles. They had the added benefit that they will keep more of the hair out of the wind. This video shows how to do 10 different hairstyles.
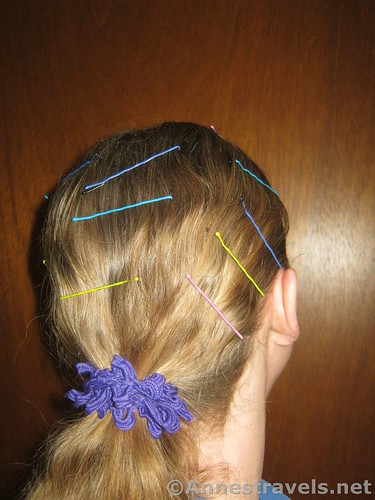
12. Pretty Bobby Pins
You’ll need: bobby pins (about 16), nail polish (optional)
This is simple and is good for keep the hair near the roots from flying, which is great in high winds. All you need is a lot of bobby pins and some nail polish in complementing colors. We used light pink, light blue, purple, and yellow. (All right, so we really used the colors that we don’t wear on our nails because we don’t like the colors…) Directions below.
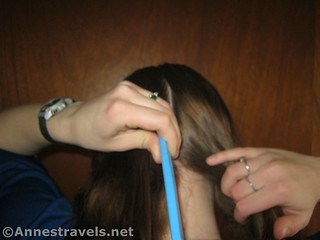
So the first thing you’ll need is a few different colors of nail polish and some bobby pins. I recommend clipping them to the edge of a piece of cardboard, not touching – this will make them easier to handle and to dry. Take the bobby pins and paint the tops of them with the polish. This is pretty easy and can be done in a matter of a few minutes. Lighter colors may need more than one coat, but darker colors will probably be fine.
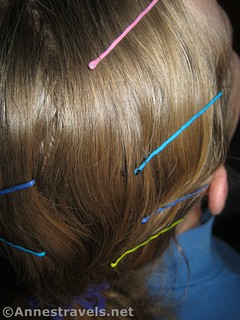
Once you’ve painted the pins, slip them into your hair, right up near the roots. I like to put them in right along the hairline and along my part. Note the wear and tear – i.e., not much – these have been across the country several times, worn 24/7 (yes, even for sleeping) for many weeks in a row, and they still look better than with their original paint!
Bonus tips for dealing with hair while hiking:
Bonus tip #1
If you have bangs, you probably will want to make sure you have a fine-tooth comb somewhere in your pack. It’s hard to keep bangs looking good while you’re out on the trail. You could also pin them back so they’re not falling into your eyes. Also, if you’re heading out on a long trip, make sure you trim them first. Even if they’re not too long before you leave, after a couple of weeks, they probably will be.
Bonus tip #2
Brush your hair daily. It may take you some time, but brushing the hair will keep it looking better and will also distribute oils from your skin to the drier bottoms of the hair, which will help keep it healthy even if you can’t wash it very often.
Bonus tip #3
As you probably noticed in the tutorials, we tend to go “au naturel” in hair on the trail – no hairspray, hair gel, etc. You’re welcome to try that if it might help keep your hair under control, especially in windy environments.
Bonus tip #4
If you are really into the pretty, bring along some funky scrunchies, hair elastics, clips, bobby pins, or headbands to dress yourself up – I find hiking more fun when I know my hair is pretty as well as functional!
What hairstyles do you wear on the trail? I’d love to hear about them in the comments below!