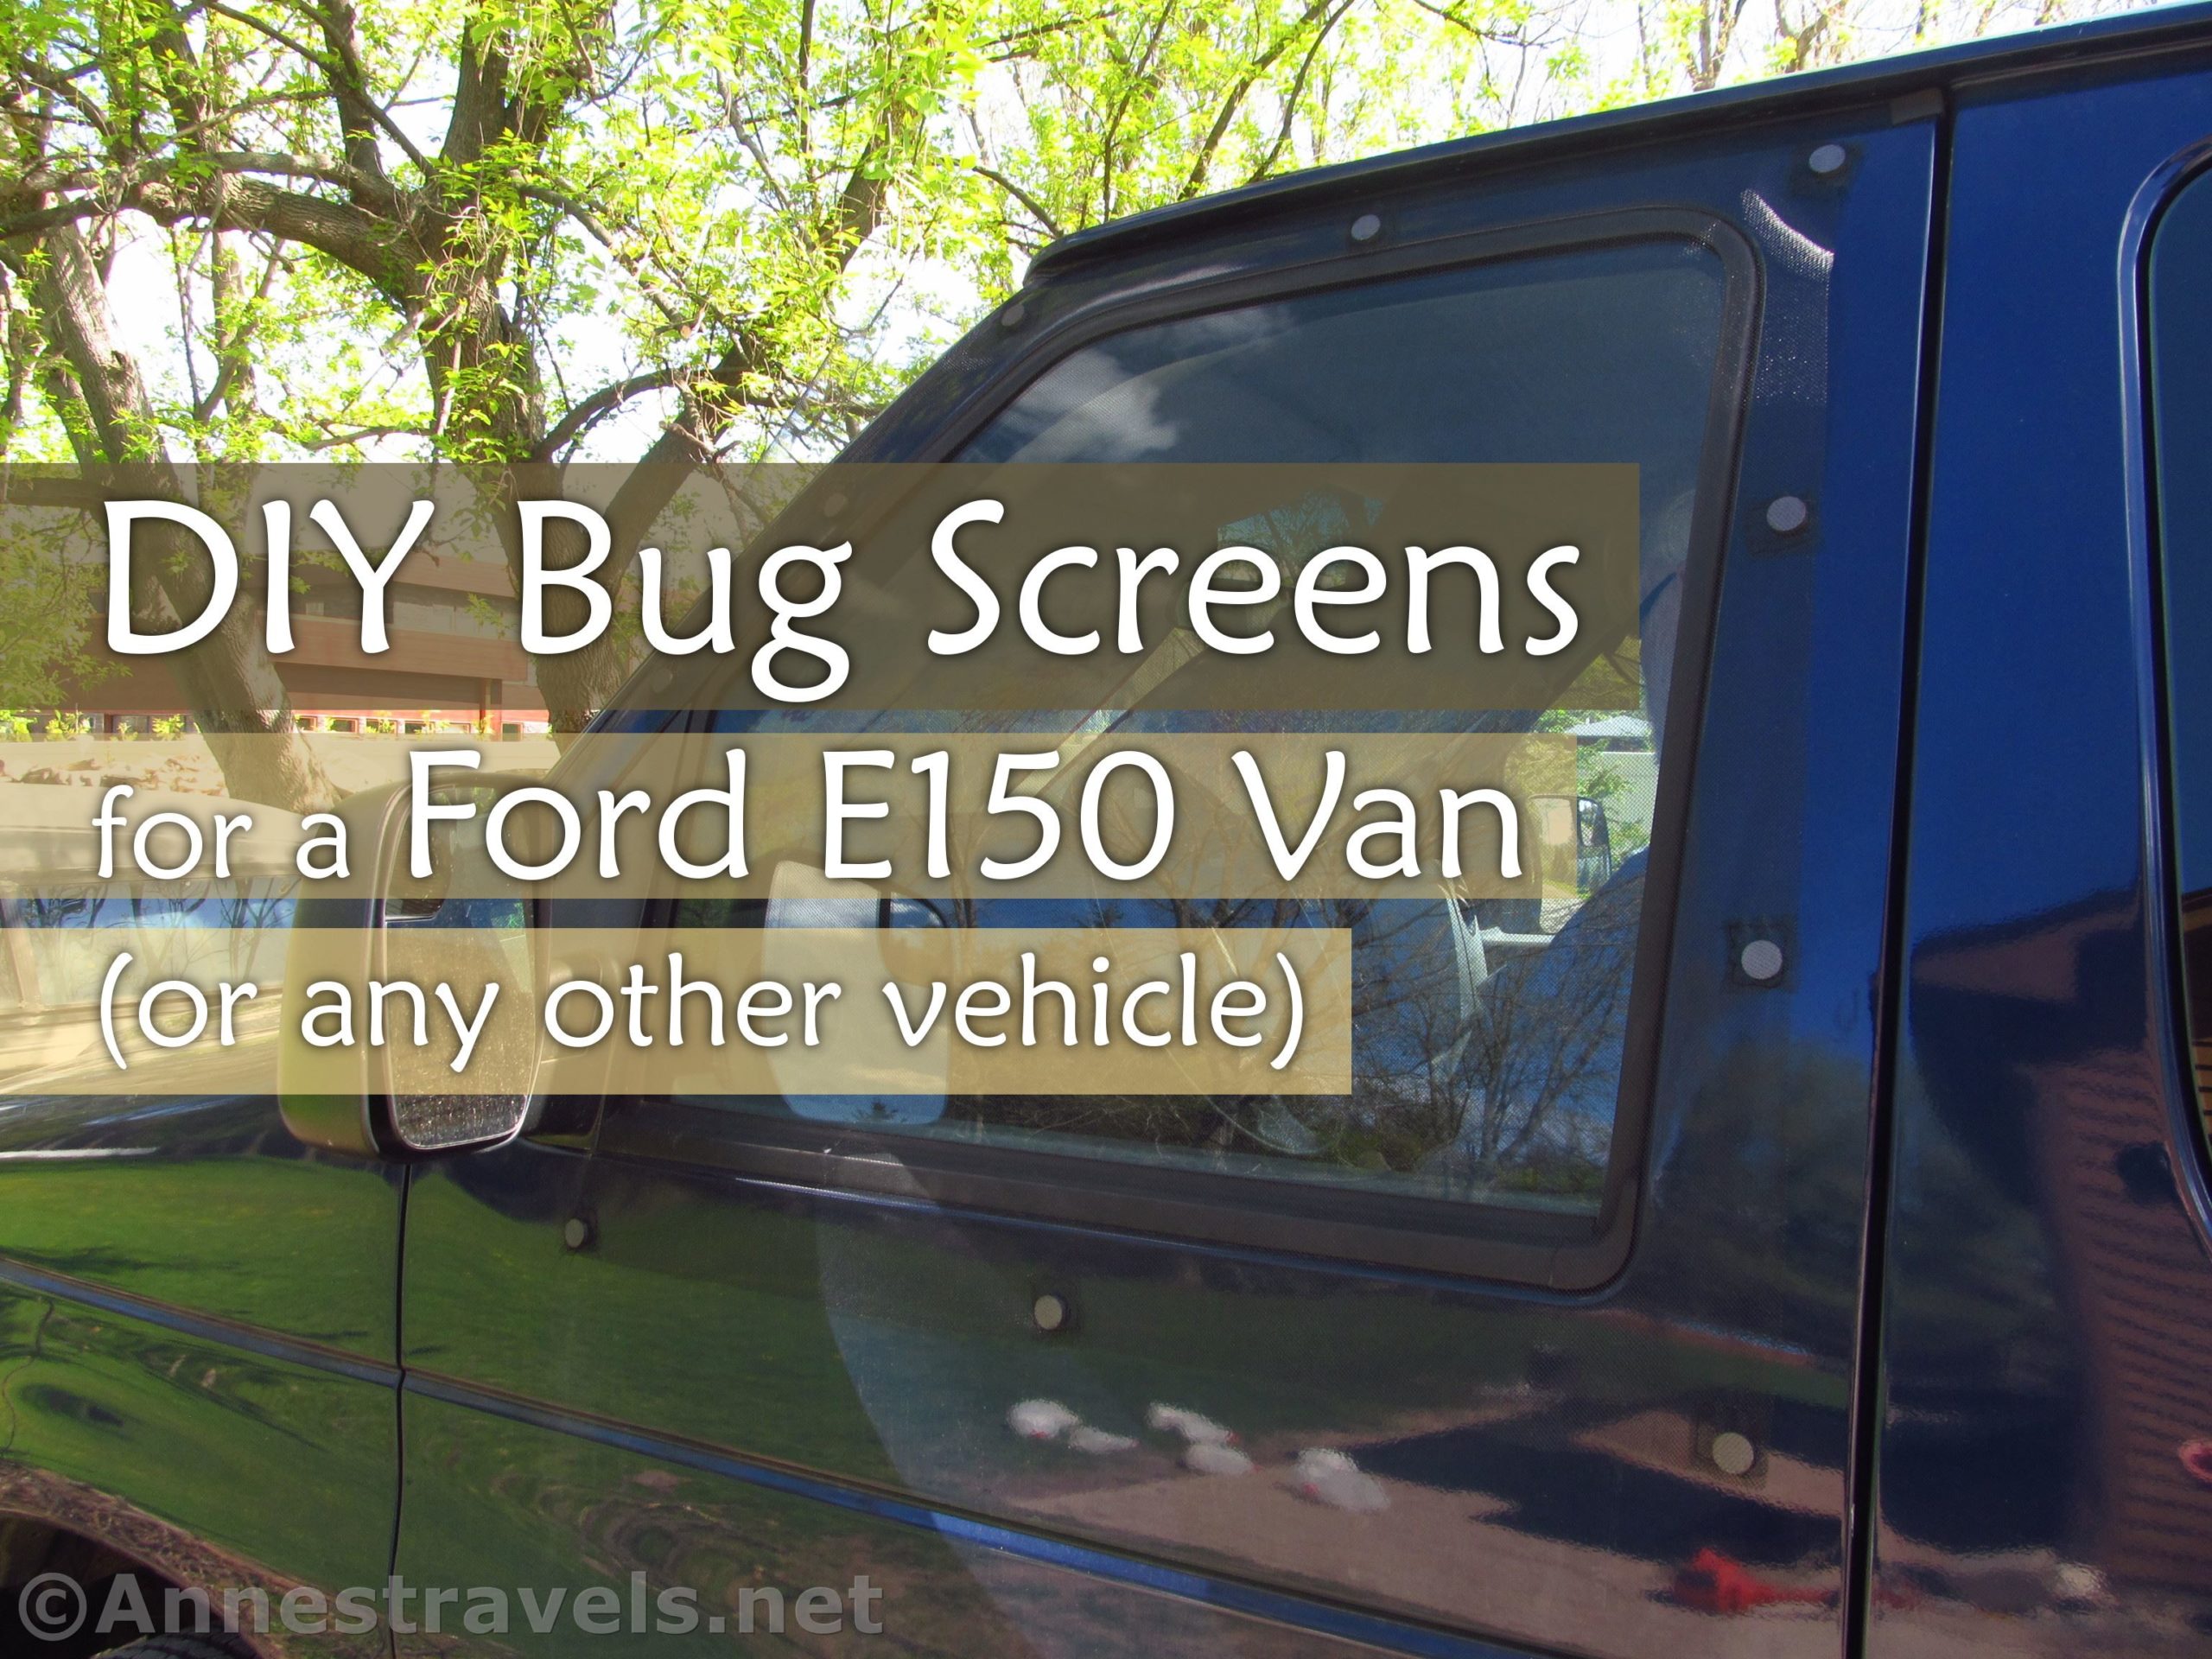
Bug screens are one thing we always take with us on trips to the wilderness. Because we sleep in the van, it’s very helpful not to be eaten alive while we try to sleep (I’m thinking of one New Years in Florida where we slept in the middle of a swamp and I’m not sure which kept us awake more: the mosquitos or the fireworks). When we purchased a new (to us) Ford E150 van, one of the first orders of business was to sew up some new bug screens: the ones from our old Dodge Ram 1500 just weren’t going to fit on the bigger E150 windows.
Of course, you can use this method to make screens for any vehicle – adjust to your needs!
Materials
Everything you need can be picked up at a big-box craft store such as Joanne’s or Hobby Lobby (you might even be able to get it all at Walmart), though different stores carry different types of netting.
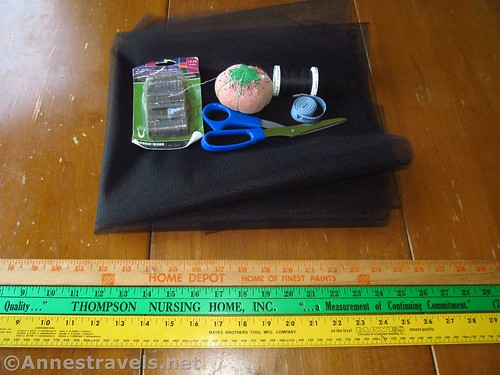
Netting – I use petticoat netting from Joanne Fabrics (my local Hobby Lobby doesn’t carry it). Basically, the holes should be small enough that the bugs can’t get through, but large enough to breathe – think a screen door. You could also use real mosquito netting. I used 3.5 yards of black petticoat netting.
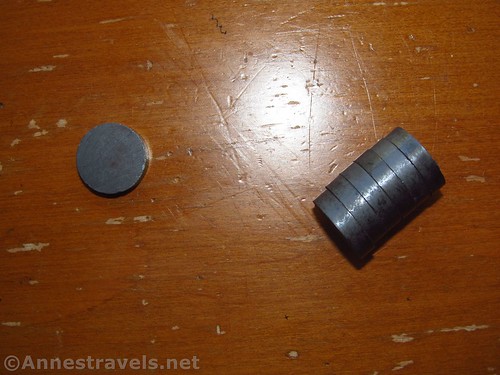
Magnets – they must be very strong; for example, these. I got these at Michael’s a few years ago, but there are ones just as good or better online. I used 40 ¾ in. magnets, 10 on each screen. Feel free to use a different size magnet, but realize that you might need to adjust the size of the netting squares.
Thread – to match the netting. My netting is black (the better to blend in with semi-tinted windows!) so I used normal, everyday Coats & Clark black sewing thread that you can pick up at any craft store or even Walmart.
Tools
Flexible Tape Measure – for measuring the windows.
Straight Pins – not absolutely necessary, but they’ll make your life easier. T-pins can be substituted if necessary.
Square or T-square
– optional; but you’ve got to get a straight, square edge somehow.
Yardsticks – tape measures might suffice, but those long straight edges are useful. I used a total of 3 yardsticks, but you may be able to substitute something else (for example, a standard tape measure) for one or more of them.
Scissors – sharper is better than duller, but that’s true about most projects using scissors. A rotary cutter
can be used for cutting the netting, but it’s a very long cut.
Sewing needle – you just have to be able to put the thread through the eye, and the eye needs to be small enough to easily slip through the holes in the netting. Otherwise, it doesn’t matter if it is blunt or pointed.
Measuring the Windows
For the front windows, measure across in the widest place, then measure up and down at the widest place. Measure in such a way that the measurements are about an inch to two inches larger than the opening for the window. If there is plastic around the mirror, measure beyond it to the metal (magnets don’t stick to plastic!)
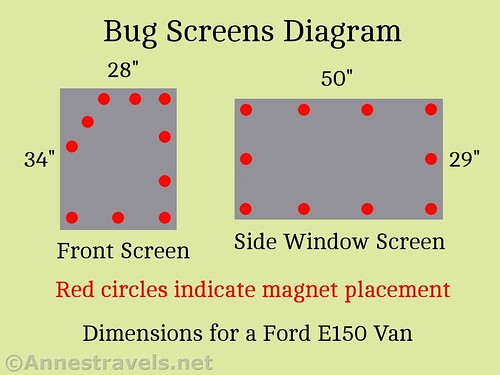
The screen for my front window measures 34”x28”.
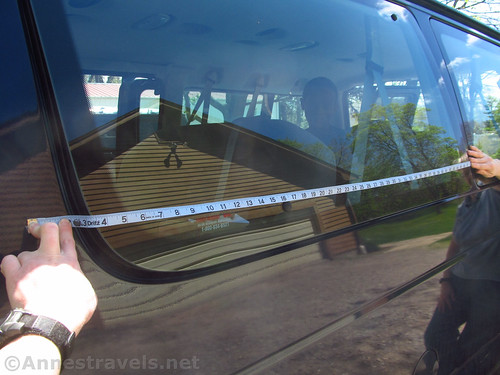
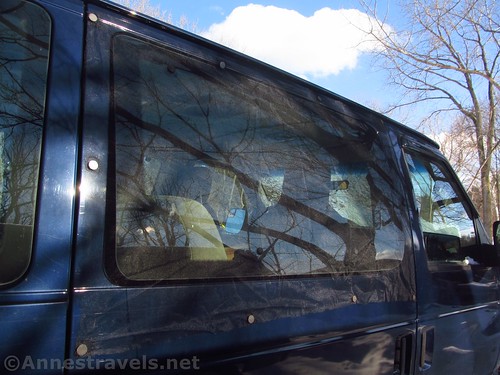
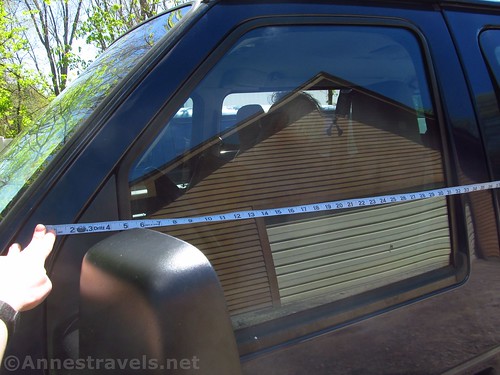
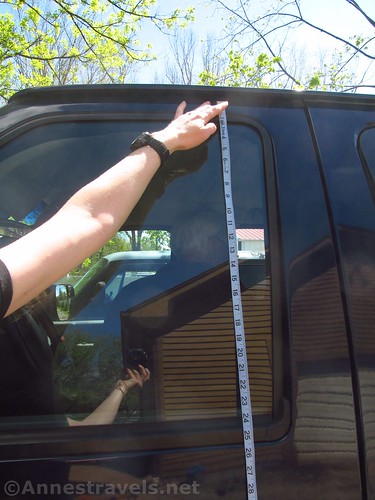
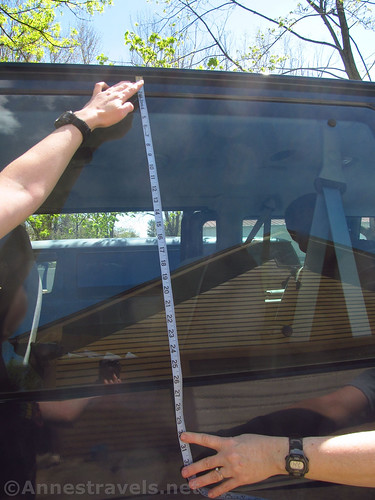
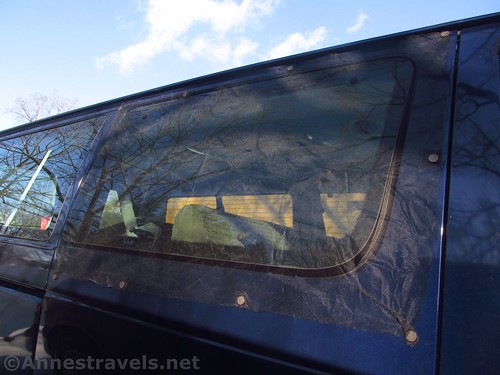
For the side windows, open up the window (what good are bug screens without the window open?) and measure across the bottom at the widest point, including the space between the side of the van and the open window (see the pictures). Again, add one to two inches on each side of your measurement. With the window still open, measure from top to bottom, again including the opening at the bottom of the window (you want the screen to cover the opening and then extend an inch or a bit more beyond the bottom of the opening). See the pictures; I think they’ll help.
If you have barn doors or back doors, use the side window method to measure these windows. Our van has a slide door, and the back windows don’t open (really???), so I made an identical side screen for the window in the sliding door and did not make screens for the back doors.
My side window ended up with screen measurements 50”x29” – at least, that should work; I ended up making it about 51.5”x30.5” and it’s really a little big.
Cutting the Screens
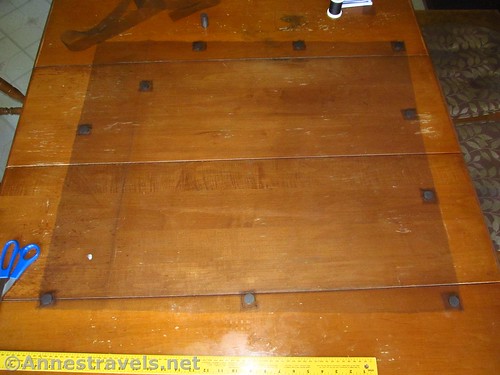
Lay the petticoat netting out on a flat surface – it needs to be large, so you’ll probably find yourself using the floor (I happen to have a very big table, so I used that). Fold the netting in half lengthwise so it is now half as wide as it was.
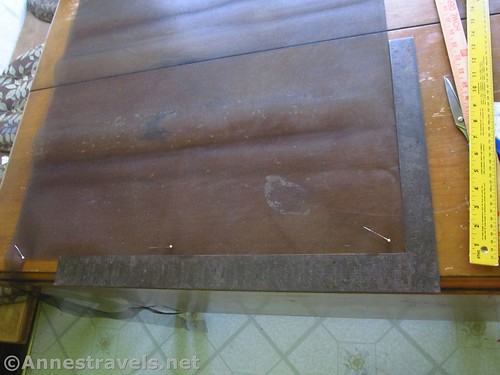
Square off one end (using the square or t-square, or whatever works for you) so you have a nice, straight edge. As you can see in the photos, I had pinned the edge-to-be-squared so everything stayed in place once I cut it.
Bring out your three yardsticks or tape measures. (If you don’t have three yardsticks, you’ll have to become creative with measuring this – it’s totally doable without so many measuring implements.) Place two of them so that the line that measures half the measurement of the width of the side window is on the folded edge (the netting is doubled over, remember) – my half measurement is 25”. Place the third yardstick along the “0” edge of both yardsticks. This will give you a straight line to cut along.

Cut along the third yardstick (rotary cutter or scissors; you could mark out the path with pins or other markers).
Now place the two yardsticks so the height of the side window is on your pinned, squared-off end (for me, this was about 29”). Place the third yardstick at the “0” end of both yardsticks, creating a straight line to cut along.
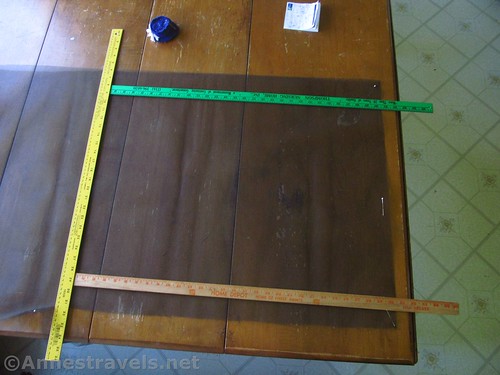
Cut along the third yardstick. You should now have a piece of netting the height and width of your side window – for me, 50”x29”.
Repeat the procedure if you need a second side window (I did for the slide door).
For the front door screens, unfold the netting (no photos; so sorry!). Use your two yardsticks to measure up from the squared-off edge the height of your front window (for me, 28” mark on the squared-off edge). Use the third yardstick across the “0” end of the two yardsticks as your straight edge to cut the height of the width of your window. Use the same strategy to cut the width of the window (for me, 34”).
Repeat for the screen for the second front window.
Magnets
Use some of the leftover netting to cut squares 1.25” by 1.25”. You’ll need as many squares as magnets, so I cut 40 squares.
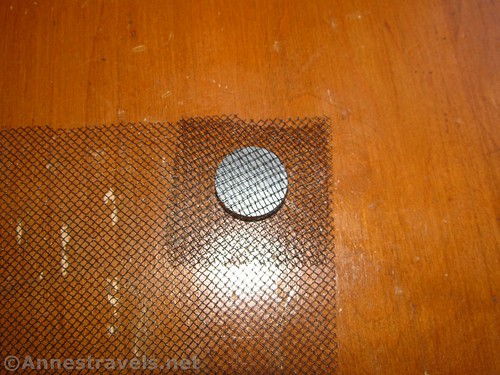
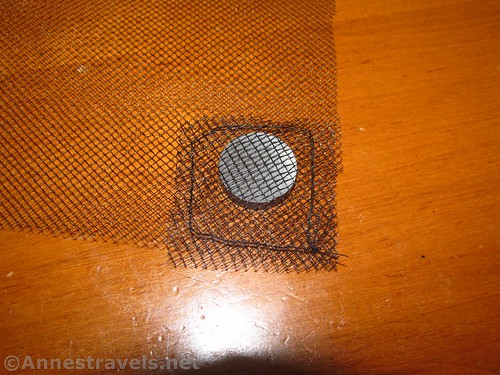
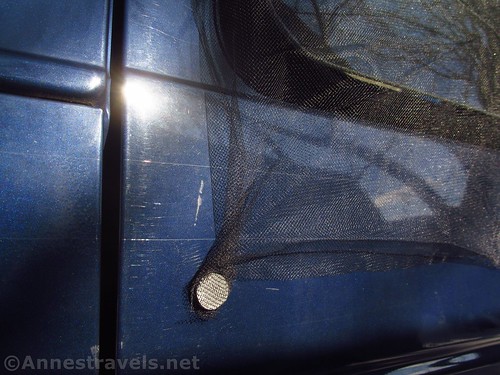
It’s easiest to begin at a corner, so take one of your side screens and place it on a hard surface (you can do it in your hands or in your lap, but I find it easier on a hard surface like a table). Take one netting square and place it on top of one magnet, centering the screen over the magnet.
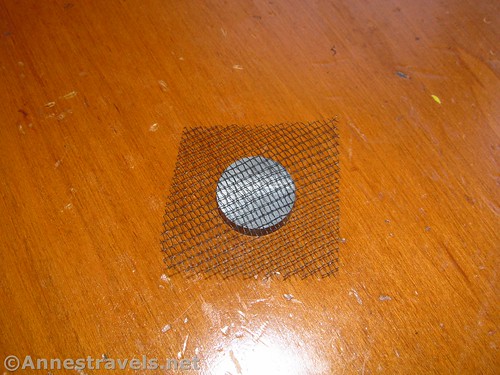
Pick up both together and place them on the corner of the side window screen so the corner of the netting square matches up with the corner of the side window screen (see the picture – it doesn’t have to be perfect) and the magnet is now “sandwiched” between the side window screen and the netting square.
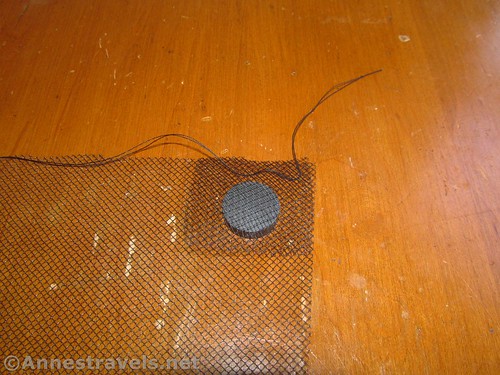
Thread your needle so that the two ends of the thread are about equal, and tie the two ends together so you have a double thread (I’m not sure the double thread is altogether necessary, but it makes me feel better). Use the needle to do a running stitch along one edge of the netting square, about 1/8 to 1/4 inch away from the edge, sewing the netting square and the side window screen together. Do not pull the thread all the way through to the knot; leave a couple inches of “tail” (see the picture).
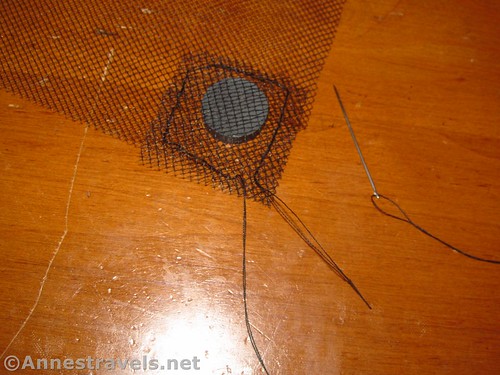
Continue around the other three sides of the netting square. When you’re done, the magnet is now encased in a pocket of netting, and your hard work should look something like this:
Tie the “tail” with the knot and the working end of the thread together securely.
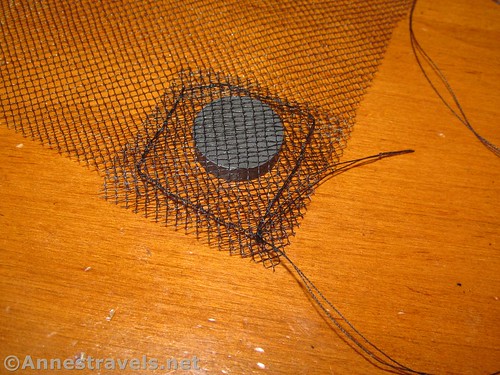
Trim the ends so it looks pretty.
Ta-da! Your first magnet is attached. Only 39 more magnets to go…!
Use a similar method to attach the rest of the magnets to the screens, using the placement diagrams below.
Finishing Touches
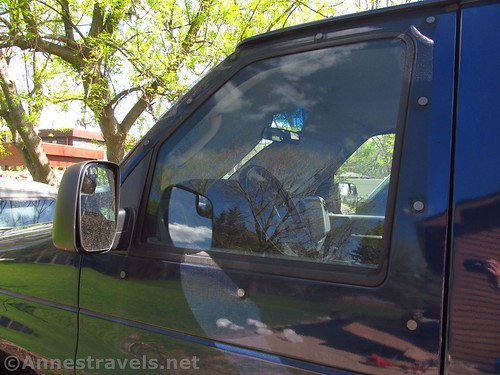
Once the magnets have been sewn in place, take the screen(s) out to the van and try them out. The front screen can just be put in place (the magnets on the angle along the angle of the door); the side screens are put in place and then the bottom corners are twisted once or twice to make a closer fit between the van and the screen (you’ve got to take in the slack somehow!) Pull the magnets around to get the best fit possible; they have a habit of sticking to themselves and anything metal.
That’s it! Enjoy bugless (or nearly bugless!) times in your van!
This Week’s Featured Product!
Need magnets for making bug screens? These are strong and you get enough for screens for every window in your van.