Recently, I’ve been experimenting with drying applesauce (or making a kind of DIY apple fruit leather, if you’d like to use that terminology). It really tastes delicious, is healthy, and would make a great trail snack – but I don’t think much of ours will make it to the trail. In fact, most of it seems to disappear about as fast as I make it.
(Affiliate links are present on this page.)
I’ll cover three different methods of drying the applesauce. The dehydrator method is probably the easiest, because, well, that’s what it’s made fore! The oven method will work for most people, whether they have they have a dehydrator or not. I use my woodstove, and as I can’t seem to find much information about that on the internet, I thought someone might find it useful, too.
What you’ll need to make Dried Applesauce:

Applesauce. The amount will depend on how big your baking sheet (or dehydrator tray) is. I’m guessing I used a couple cups. You can use store-purchased apple sauce or homemade (with or without cinnamon – I’ve never tried it with sweetened applesauce, but suspect it would work ok). We’ve been blessed with a terrific amount of apples this year, so I make my own. I peel, core, and chop enough apples to fill a 4 qt. pot, then add 1c. water and 1 Tbsp. cinnamon (you can leave that out if you want – it’s a mild cinnamon flavor). Boil (I do it on the top of the woodstove, but the stovetop would work just as well) until the apples are very soft. Cool for a bit, until it’s safe to handle. I then crank it through a Foley Food Mill (a blender would also work) to make the applesauce smooth and to get rid of any seeds, stems, etc. we missed. It’s now ready for eating (yum!) or to make into dried applesauce. This makes far more than you’d need for one batch of drying, so plan on eating some undried applesauce for dinner (talk about a heathy side dish!) or make several batches. (Or maybe I’ll make an 8 qt. pot of applesauce and do both…)
Rimmed baking sheet or dehydrator trays. It can be larger than your woodstove griddle. Mine is an old baking sheet that we don’t use much. Note that if you plan to use a dehydrator, you will need the dehydrator trays instead of a baking sheet.
Waxed paper or parchment paper. I use waxed paper, because I have it.
Non-stick cooking spray (y’know, PAM – or the generic thereof).
Spoon or spatula. To spread the applesauce on the tray.
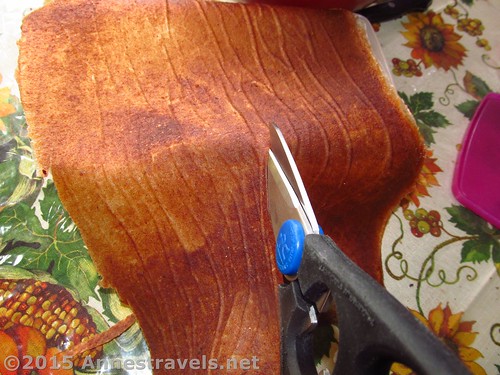
Cooking scissors (optional). For cutting the finished product. Make sure they’re clean – you don’t want duct tape residue on in your dried applesauce.
Step 1
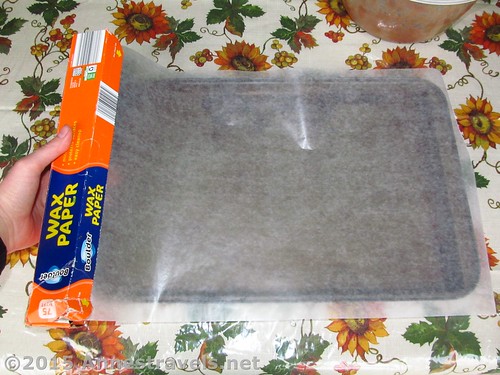
Cut a piece of waxed or parchment paper that will fit the baking sheet (or dehydrator tray) – you want it to slightly overlap the raised edges of the sheet.
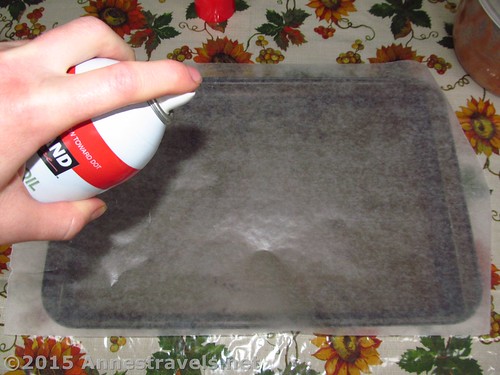
Spray lightly with non-stick cooking spray. (You can skip this step, but if the applesauce is even slightly overcooked – a given on the woodstove – it can be very difficult to remove from the waxed paper. Yum, yum – a little extra fiber…)
Using a spoon or spatula, spoon applesauce onto the prepared waxed paper on the baking sheet or dehydrator tray.
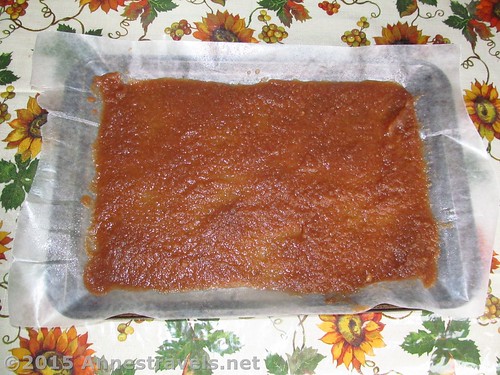
Spread out the applesauce, adding more as necessary to achieve an even ¼ in. thickness all over the prepared pan. Even really matters – do your absolute best to get it evenly spread!

Step 2
Now you can choose your drying method: Dehydrator, Oven, or Woodstove.
Dehydrator Method for Drying Applesauce
Well, to be perfectly honest, I don’t even own a dehydrator. But my friends over at http://www.trail.recipes/ (who inspired this post in the first place) do, and they say to put the dehydrator tray in the dehydrator and dehydrate at 125F for 10 to 12 hours, or until pliable (see http://www.trail.recipes/#!Dehydrating-123-Making-Applesauce-Leather/cse2/552754780cf21e26bae9742e)
Oven Method for Drying Applesauce
I’ve never dried applesauce in the oven, either. But I hear it works great to set your oven to 140F to 170F (basically, as low as your oven can go), put the tray in the oven, and leave it until it’s no longer sticky (about 8 to 12 hours). (Source: http://www.sixfiguresunder.com/fruit-leather-from-applesauce/)
Woodstove Method for Drying Applesauce
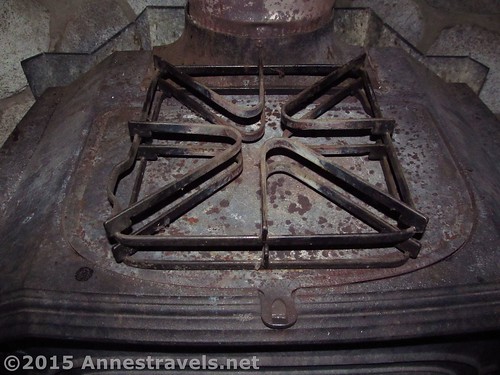
But I do have a woodstove, and that’s what I use to dehydrate applesauce. Actually, I’ve also dehydrated apple slices on racks on baking sheets using a similar method – but I really had to pay attention to it, or some would burn before others were dried. It works, it just takes babysitting. Speaking of babysitting, note that this method takes considerably more babysitting than either of the other methods – but it also saves a lot of $$ in fuel and electric bills if you’d have the woodstove running anyway. And considering the time of year, we have the woodstove going every morning if not all day long.
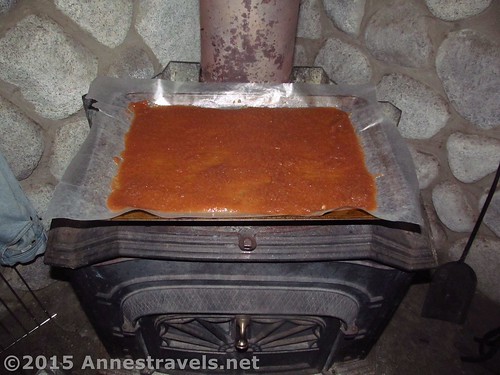
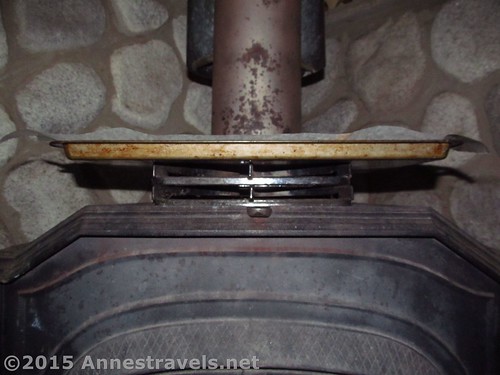
Place the tray either on, above, below, in front of, or generally near the woodstove. You probably don’t want to set the tray directly on the stove – that would be too warm, and you’d end up with burned applesauce instead of dried applesauce. I place two grates from an old gas stove on top of the woodstove, then place the tray on top of this. That works great until the fire is too hot, and the stuff starts boiling… then it’s to resort to placing the tray on top of a box (not one that will catch fire if too hot, or one that will melt) in front of the stove. That method is slower, but will work. Wherever you end up placing the tray, don’t let it touch the stove itself or the stovepipe.
Check the applesauce every half hour or so. You don’t want it to burn. I typically have to turn the tray 180 degrees after about an hour (depends on how hot the fire is) because the edge near the stovepipe is drying faster than the side that hangs off the stove.
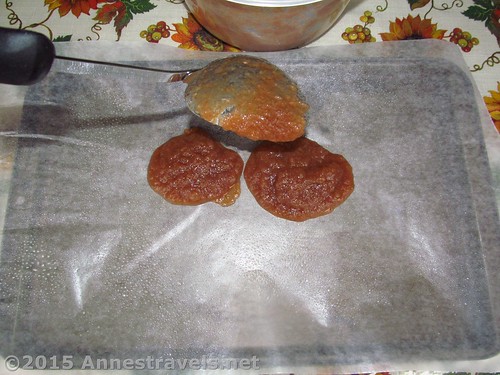
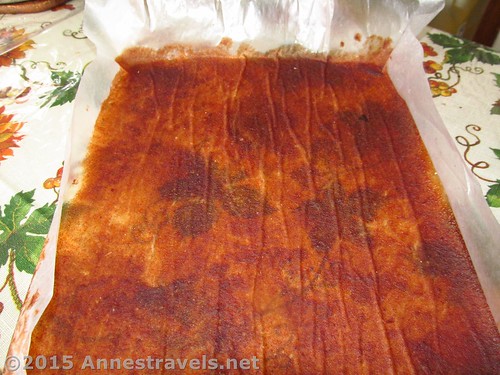
As soon as patches begin looking dry (not shiny / sticky – that means the applesauce is overdried, and while it’s still perfectly eatable, it may taste overdone), remove from the woodstove. How long will this take? Well, it really depends on the heat of the fire in the stove. Mine often takes 2 to 4 hours, but I’ve had it burn in only 2 hours when a fire was especially hot and I forgot to turn the tray. The key is to keep checking it and not let it go too long – some patches will still look very apple-saucy, but all the applesauce should be beginning to look very dry in patches, and you should be able to press your finger into it (don’t burn yourself!) without the finger sinking in.
Pick up the entire wax paper and set it on the woodstove hearth or another warm, dry place to finish drying. (The tray can be refilled at this point and another batch placed on the woodstove.) Depending on the warmth of the area, mine typically takes between 2 and 24 hours to finish drying completely. The dried applesauce should feel try to the touch (not sticky (overheated / overdone) or goopy (let it dry longer)). When you think it’s dry, carefully peel off of the waxed paper. If the underside still seems wet in places, allow it to dry a bit longer.
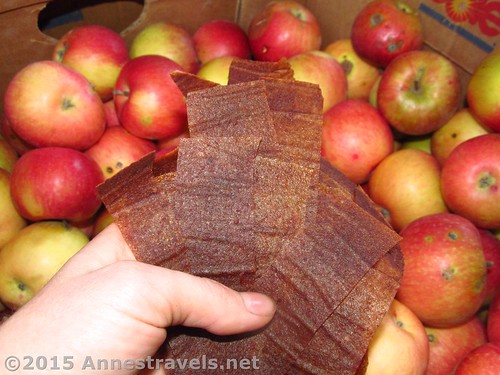
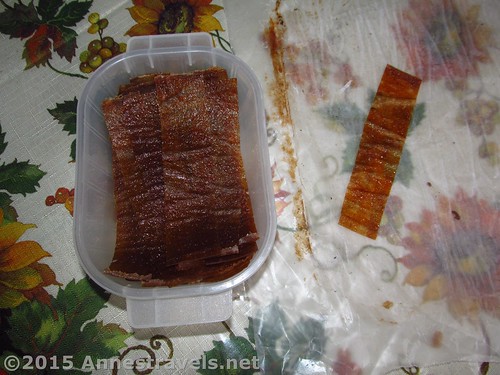
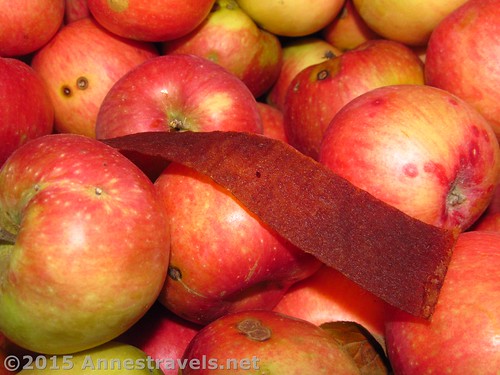
When fully dry, peel the dried applesauce off the waxed paper…
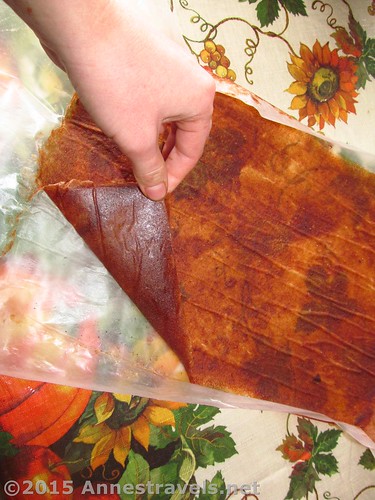
…cut or tear as desired…
…and enjoy!

Or, you could always store it in an airtight container at room temperature or in the refrigerator… if you can keep it away from the ravenous hordes that long! I hear that if you place it in the freezer for 4 days, the dried applesauce can then be stored in a cool, dry place for more than a year. And then you could pull some out for the trail whenever you wanted. But I wouldn’t know. It simply disappears every time I turn my back…
This Week’s Featured Product!
Want even more dried food on the trail? This book tells you how to eat well – and tasty – by making the food at home, drying it, and then, simply and quickly, rehydrating it on the trail.