Near Hole-in-the-Rock Road in Grand Staircase Escalante National Monument there is a wash that turns into a canyon, and through this canyon runs a small, perennial stream. The canyon (which goes under the name of Coyote Gulch) also hides several spectacular arches/natural bridges and an old Anasazi ruin, and the stream boasts not a few small waterfalls. It was here that we decided to take a hike one warm, windy day in May. It wasn’t exactly a stroll in the park – climbing down near sheer cliffs isn’t exactly walking through the Boston Public Gardens – but scrambling down the cliff face and then strolling through the stream on a hot day made for an adventure and an unique experience. Add to this the pristine, awe-inspiring scenery, and it was a day that will live long the in the minds of the members of my group!
I’d originally planned to do Coyote Gulch as a loop in a very long, 13+ mile (21+ km) dayhike. However, I realized my group simply couldn’t do this, so I decided we’d take two dayhikes – one starting near the Crack-in-the-Wall and the other starting from the one place you can scramble out of Coyote Gulch further upstream. This didn’t pan out either, because we couldn’t make it to the Crack-in-the-Wall end of the road due to deep sand. Not to be dissuaded, I revised our plans again to scramble down the exit from Coyote Gulch near Jacob Hamblin Arch, then walk downstream and see how far we got. I had some pretty good instructions, and we’d be in the canyon for 90% of the hike, so I figured we couldn’t get too lost.
We parked by the water tank at the Jacob Hamblin Arch Trailhead and slept there overnight so we could get an early start in the morning. (Backpackers starting from this end (which are few – most either start at Crack-in-the-Wall downstream or hike in from the Hurricane Wash trailhead on the Hold-in-the-Rock Road) typically hike into the canyon for the first night, sleep in the shadow of Jacob Hamblin Arch, then set out down the canyon the next day.) After a rather windy breakfast (think: sand in your cornflakes), we began the cross-country section of the trail that would lead us to the rim of Coyote Gulch. From near the water tank, a trail leads out across the desert. It is faint, but still followable. I’d guess you could follow the trail pretty well without a GPS, although I wouldn’t try it without either a GPS or a map and a compass just in case.
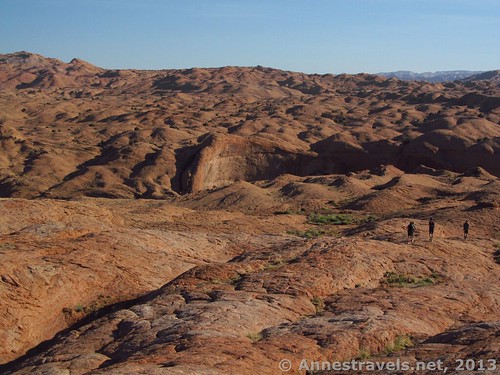
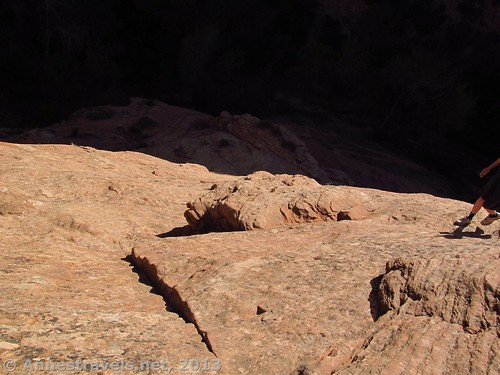
Hiking down the slickrock – the deep shadows indicate where Coyote Gulch is, and the large fin to the left of center is Jacob Hamblin Arch
The trail is quite sandy for a bit as it drops away from the water tank and heads toward a large rock monolith. It then crosses a slickrock area marked with cairns, making its way around the monolith, across a couple washes, and over a few sandstone fins. The trail is not strenuous; you just need to keep your eyes open for the next cairn, trail among the sage brush, etc.
After about 1 mile (1.6 km), you will notice that the ground is becoming more sloped and that you are hiking on slickrock more than before (I’ve also heard that this begins after nearly 2 miles (3.2 km), but I believe my GPS was reading less than this). You are approaching Coyote Gulch; this is where things get a bit tricky. We probably spent at least 20 minutes trying to locate the right set of cairns that led us to the cliff edge at a place where we could descend. It’s not that there are so many different cairn trails going to different places; it’s more that there are several cairn trails leading to the same place and none of them are complete enough to get us to the right place at once. Even when we got to the right place, we wondered if it was correct because it was, well, a very steep drop into the canyon! I’ve included the GPS coordinates below so you won’t be as unsure as we were; for those without a GPS, I’m sure you can find it, but you may spend a bit of time looking.
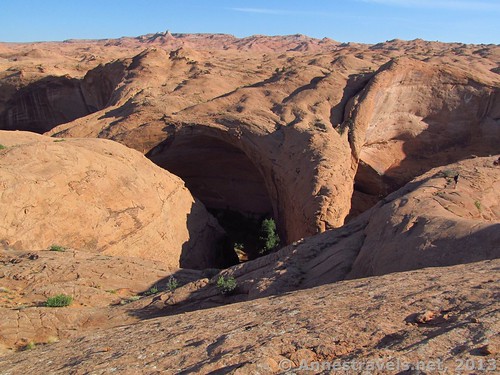
Approaching the descent (you’ll be heading right from here), you can see the fin that comprises Jacob Hamblin Arch
I’d read that this drop was a crazily steep scramble that wasn’t for the faint of heart – “bring a rope”, one source said, “to haul up members of your party who are afraid of heights.” Apparently this and the other sources didn’t dream anyone would be crazy enough to go down. This said, I was pleasantly surprised to find that the members of my group had little serious trouble climbing down. I’m sure this is because most of us have years of experience with bouldering; the most difficult part is figuring out exactly which way to go next, and in bouldering this is something that becomes second nature. It was steep; it was slippery; it wasn’t for the faint of heart – but we did it ok, slowly, slowly working our way down rock ledges, sandstone slopes, and even moqui steps left by the Anasazi long ago.
At last we reached the sandy, grassy slope at the bottom, a bit shaky perhaps, but ready for the final switchbacks down to the bottom of Coyote Gulch, itself. Note: there is a primitive toilet to the right of where you’ll come down. The original toilet has burned down, but keep following the trail toward the cliff and you’ll find a toilet behind some bushes that you can use.
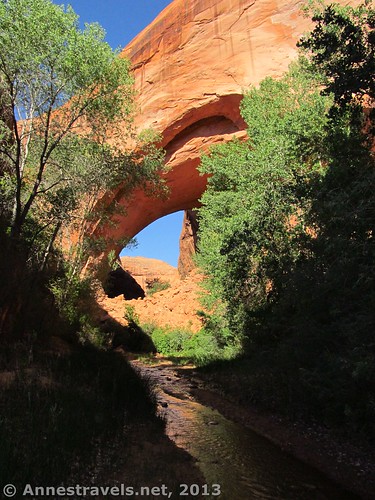
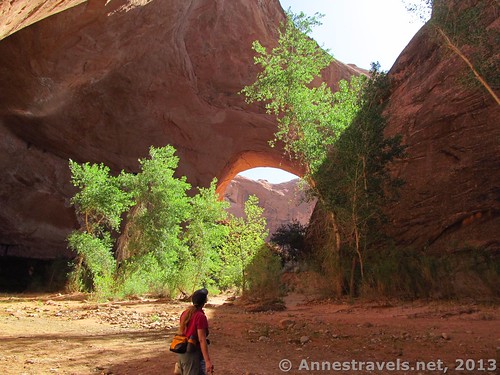
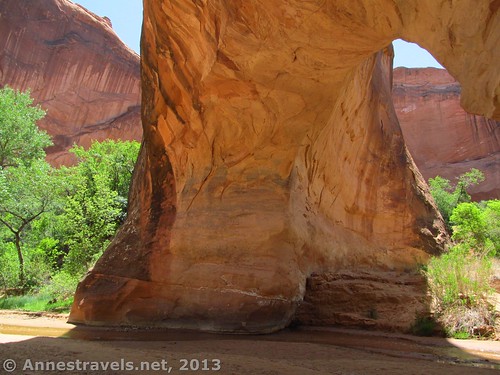
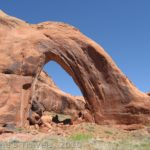
When you reach the bottom of Coyote Gulch, turn left and walk (either in the stream or along the trail next to the stream) a hundred feet (30 m) or so. Then look up. Ahead of you is the massive Jacob Hamblin Arch (also known as Lobo Arch). Just for this, the trail is worth the effort. In the early morning sun, with the shadows still deep in the canyon, the arch looked even more impressive.
We decided to keep walking upstream for a bit so we could see the other side of Jacob Hamblin Arch. We did this in our hiking shoes until we were nearly around; then realized we’d be better off switching to our water shoes (an odd assortment of water shoes, sandals, hefty flip-flops, and old canvas shoes). For hiking in Coyote Gulch, walking in the water is a must in most places, and shoes that can become wet are very useful. However, on our return trip, I walked barefoot and was fine since the streambed is, for the most part, sand; in other places it was very nice to have something stable under my feet because of the rocks, sticks, etc. We continued around Jacob Hamblin Arch and then continued upstream for a short distance more so we could get some nice pictures of the arch. Then we turned around and headed downstream, since this was the direction we really wanted to go.
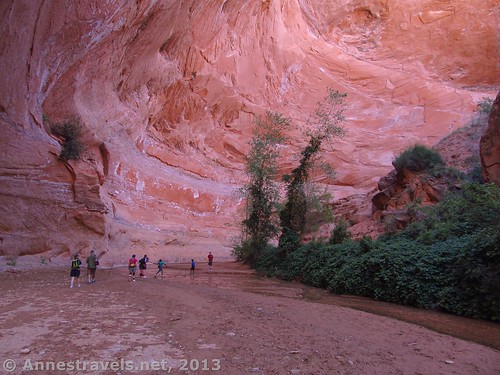
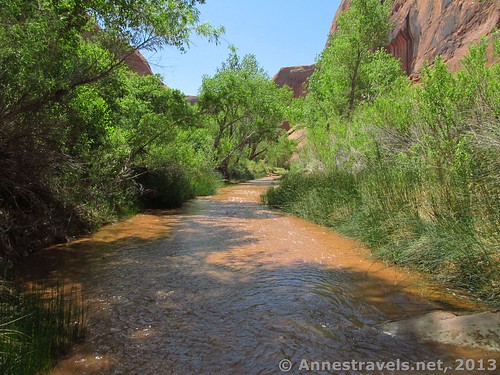
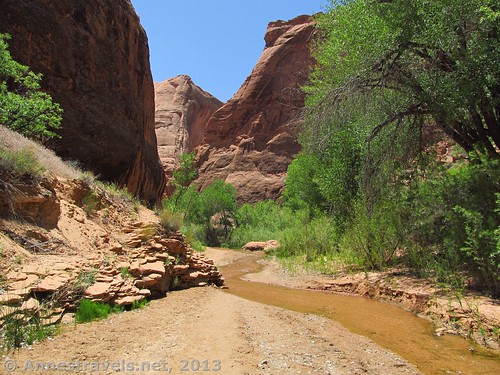
The stream flows fairly slowly through the canyon, rarely more than ankle-deep when I visited. It is slightly meandering at times, but since it can’t go through the canyon walls, it stays on a course that follows the curving, winding canyon. There are bushes and scrub trees in Coyote Gulch; however, I didn’t not see any poison ivy, and even if there was some, it would be easy to avoid by walking in the stream (which is usually at least 3 feet (1 m) wide). Occasionally the stream runs right next to the walls of the canyon; this is very impressive since the walls loom upward at least 1,000 feet (300 m) to the rim above. Wow! It’s also pretty because of the red, Escalante-type sandstone, the green trees, and the serene river flowing through it all. The video below is of Jacob Hamblin Arch.
We saw plenty of people (it was a weekend), but we also felt like we were in solitude. There are enough curves in the river, and enough white noise from the river and the light wind in the trees, that we could feel like we were alone even if another party was less than ½ mile (0.8 km) away downstream.
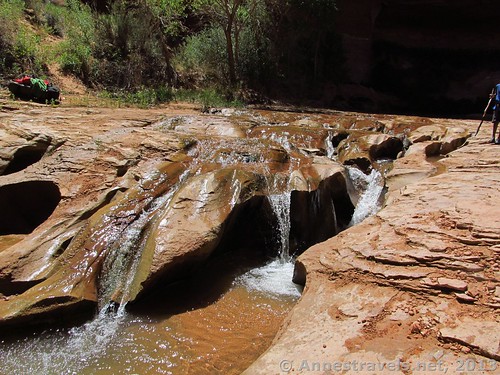
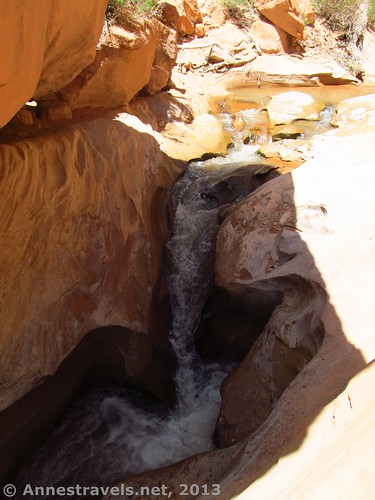
From Jacob Hamblin Arch, it is about 6 miles (9.6 km) to the Escalante River. We knew we didn’t want to go that far, but I did want to hike 2 miles (3.2 km) (from Jacob Hamblin Arch) to Coyote Natural Bridge, another impressively large span that the stream flows through. About halfway between the two arches, we came to our first waterfall. It wasn’t huge – the entire drop was probably less than 3 feet (1 m)– but it was novel and lovely. There is a small watercourse before this where the water has worn streams into the rock – pretty! A few hundred feet (50 m) further downstream, we came to our second waterfall. This is a watercourse, really, where the water has worn a curving path through the soft sandstone, then plunges several feet (about 1.5 m) down into a small pool under the overhang of a large boulder. Beautiful! You’ll have to walk out of the stream to get around these obstacles, but that’s ok because there’s plenty of slick rock to walk on next to the stream. Also, look up in this area as there are some pretty fantasticly shaped sandstone rocks nearby.
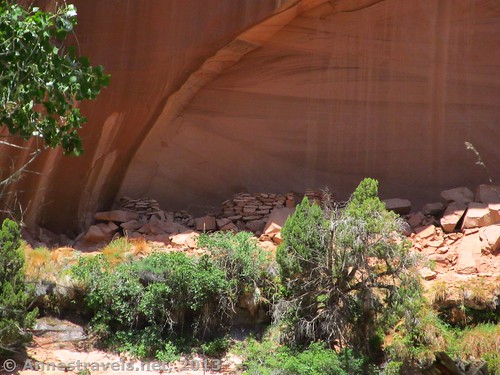
Keep walking for nearly another mile (1.6 km). This is probably the most serene part of the canyon we encountered – gentle stream, scrub trees lining the banks and offering a little shade (which was a welcome reprieve from the heat of the midday sun!) Just before you come to Coyote Natural Bridge (aka, just upstream from the bridge) you should be able to look up on the left canyon wall (if you’re facing the bridge) and see some old Anasazi ruins. These are not very visible and we didn’t see them until we were on our way back. The best viewpoints are a few hundred feet (50 m) upstream from the bridge.
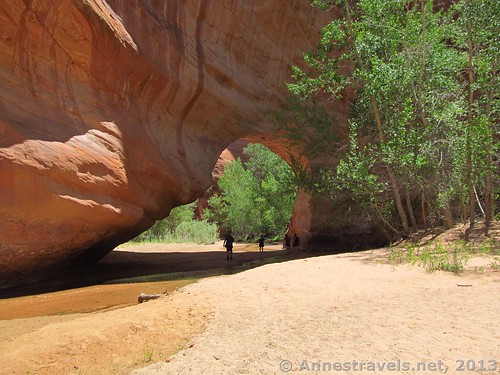
Coyote Natural Bridge isn’t as stunning as Jacob Hamblin Arch (in part because it’s difficult to get a sense of scale – the pictures don’t do it justice because of this), but it’s still impressive and worth the hike. The stream slips gently beneath the span (thus making it a natural bridge rather than an arch), while vegetation whispers quietly nearby. We found it a lovely place to sit and have a short snack before heading back upstream toward the exit point.
However, before we could exit, the little ones (ok, and big ones too) insisted we had one more activity to engage in: swimming! Donning suits behind bushes and sand dunes (there’s a lovely, secluded campsite right above the first waterfall), we splashed in the waterfalls, skipped stones across the surface of the stream, and generally hung out and enjoyed ourselves for more than an hour before changing back into hiking clothes to finish out the trek. A couple words of warning, though: 1) there are little black worms in some of the algae on the waterfalls; these are apparently harmless but are rather disgusting to get all over you/in your swimming clothes, and 2) the stream is simply chock-full of sand – be prepared to empty sand out of your bathing suit, brush it out of your hair, and generally still be sandy until you take your next shower. Worth it? Yes!
Scrambling back up proved easier than going down, but not much easier. I’ll say that this section was definitely challenging, but doable if you’re used to bouldering and don’t mind heights. Then it was only the trek back to the Jacob Hamblin Arch Parking Area. This was made more difficult by the constant wind and tired hikers, but still following the cairns and trail, we made it back without having to use the GPS. It was a good hike, and I’d love to do it again sometime – with GPS coordinates this time!
Important Note: Do not enter Coyote Gulch if it has rained recently anywhere in the area. Flash floods can occur without warning and there is no way to exit the canyon once you’re in it. Keep flash floods and higher-ground strategies top-of-mind and listen for airplane sounds that don’t go away – this could be a flash flood that is on the way.
Round Trip Trail Length: About 8 miles (12.8 km)
Elevation: Start (highest point): 4,770ft (1,450m); Lowest Point: 3,990ft (1,215m). Net gain/loss: 780ft
Facilities: Primitive toilet near Jacob Hamblin Arch. Otherwise, none.
Fees: None
Trail 


Road 


Signs 


Scenery 


Would I go 100 miles out of my way for this? 


Overall Rating: 


Key GPS Coordinates for Coyote Gulch:
Trail Beginning at Jacob Hamblin Arch Trailhead: 37.39257N / 111.04859W (37° 23′ 33.2514″N / 111° 2′ 54.924″W) (4,969ft; 1,514m)
Top of Descent into Coyote Gulch: 37.41918N / 111.04218W (37° 25′ 9.0474″N / 111° 2′ 31.848″W) (4,206ft; 1,282m)
Bottom of Descent: 37.42013N / 111.04169W (37° 25′ 12.468″N / 111° 2′ 30.084″W) (3,991ft)
Jacob Hamblin Arch/Lobo Arch East (Downriver) Side: 37.41965N / 111.04292W (37° 25′ 10.7394″N / 111° 2′ 34.5114″W) (4,072ft; 1,241m)
Nice view of Jacob Hamblin Arch: 37.41878N / 111.04427W (37° 25′ 7.6074″N / 111° 2′ 39.3714″W) (4,072ft; 1,241m)
Jacob Hamblin Arch/Lobo Arch West (Upriver) Side: 37.41910N / 111.04330W (37° 25′ 8.76″N / 111° 2′ 35.88″W) (4,061ft; 1,237m)
Watercourse #1: 37.41982N / 111.03825W (37° 25′ 11.352″N / 111° 2′ 17.7″W) (4058ft; 1,236m)
Waterfall #1: 37.41506N / 111.03359W (37° 24′ 54.2154″N / 111° 2′ 0.924″W) (4,043ft; 1,232m)
Watercourse #2: 37.41519N / 111.03261W (37° 24′ 54.684″N / 111° 1′ 57.396″W) (4,065ft; 1,239m)
Waterfall #2: 37.41516N / 111.03245W (37° 24′ 54.576″N / 111° 1′ 56.8194″W) (4,073ft; 1,241m)
View #1 of the Anasazi Ruin: 37.41603N / 111.02822W (37° 24′ 57.7074″N / 111° 1′ 41.592″W) (4,025ft; 1,226m)
View #2 of the Anasazi Ruin: 37.41634N / 111.02859W (37° 24′ 58.8234″N / 111° 1′ 42.9234″W) (4015ft; 1,223m)
Coyote Natural Bridge: 37.41653N / 111.02743W (37° 24′ 59.508″N / 111° 1′ 38.7474″W) (4,040ft; 1,231m)
The gpx file for this Coyote Gulch dayhike can be downloaded – please note that this is for reference only and should not be used as a sole resource when hiking this trail. Also, I apologize – the GPS got a bit confused in the canyon (service down there isn’t great), so it’s not as long or complicated as it looks. I would recommend using the track to the canyon, then turning it off until you’re ready to climb out again.
Download GPX File size: 260.3 KB Downloaded 1,008 times
(Note: I do my best to ensure that all downloads, the webpage, etc. are virus-free and accurate; however, I cannot be held responsible for any damage that might result, including but not limited to loss of data, damages to hardware, harm to users, from use of files, information, etc. from this website. Thanks!)
Getting to Coyote Gulch via the Jacob Hamblin Arch Trailhead
From the town of Escalante, drive about 5 miles (8 km) east on UT-12 to Hole in the Rock Road (this junction is well-marked; if you see signs for Calf Creek, you’ve gone too far). (If you’re coming from the other direction, the road will be on your left after the Lower Calf Creek Falls Area, but before you arrive in the town of Escalante.) Turn right on Hole in the Rock Road and drive about 36 miles (58 km) (note that the mile markers do not line up with this mileage). You will pass Devil’s Garden, the road to Egypt, the road to the Dry Fork of the Coyote Gulch (some connection, I’m sure, but not relevant for this hike), the Red Well Trailhead, and the Hurricane Wash Trailhead, among other roads/trailheads. After 36 miles (58 km), but before you come to Dance Hall Rock, the Forty-Mile Ridge Road (known as BLM-270 on Google Maps) will branch off on your left. Take this road for just over 4 miles (6.5 km) to a side-road that leads up a small hill to a parking area next to a water tank. This is the Jacob Hamblin Arch Trailhead.
A note on road conditions: Hole-in-the-Rock Road is generally passible by 2-wheel-drive, low-clearance vehicles for the first 17 miles (27 km), provided it hasn’t rained recently. After this, high clearance is recommended; high clearance is highly recommended for the Forty-Mile Ridge Road. This said, I watched a Chevy Prism park near the Jacob Hamblin Arch Trailhead, so at least some of the time smaller cars can make it this far! After about 4.5 miles (7.2 km) on the Forty-Mile Ridge Road it becomes so sandy we didn’t dare take our van through it – 4×4 would be required. If you have 4×4 and are planning to go further, watch out for the “killer cattle guard” you can go around – I don’t think anyone in their right mind would go over it!
This Week’s Featured Product!
Looking for a book that will show you what you’ll encounter while hiking Zion, Bryce, Grand Canyon, Moab, Arches, Canyonlands, Grand Staircase-Escalante, Capitol Reef, and more? This full-color book covers 90 trails in this spectacular area of the country with difficulty ratings, general maps, and vivid descriptions of each hike.

Hi,
I just wanted to drop a line and tell you that I absolutely love your work.
Rich
Pingback: Anne's Travels » 10 Reasons I Choose Dayhiking over Backpacking
Pingback: Anne's Travels » How I Plan a Trip
I am planning on going to Coyote Gulch next week. The plan is to start at the water tower (Jacob Hamblin Arch Trailhead) and scrambling down the emergency exit at Jacob Hamblin Arch. I have heard there a spot to tie a rope to at the top to make the descent less difficult. I have hear others say there is not anywhere to anchor a rope to. Can you comment on this?
Hi Kevin,
I don’t recall seeing anything to anchor a rope to, but as I’m not a rock climber, I really can’t comment on it. I had no trouble at all scrambling down (let alone back up) without a rope.
Anne
Pingback: Celebrating 20 Years of Family Vacation - Anne's Travels
Pingback: 12 Trails that Require Hands & Knees, River Crossings, and Other Adventures
Pingback: 9 Reasons I Wear Hiking Boots instead of Sneakers
Pingback: 10 Best (and worst) Day Hikes in Grand Staircase-Escalante
Thanks for your information! Very impressed by the Jacob Hamblin Arch and want to hike in Mid Sep. We will stay at Escalante for one night and come over to Jacob Hamblin trailhead in the morning., Do we have enough time to hike from there to Jacob Hamblin Arch and back to the trailhead in 5-6 hour’s time?
Pingback: Gear Review: Garmin Montana 600 Hiking GPS - Anne's Travels
Pingback: Hole in the Rock: Scramble to Lake Powell! - Anne's Travels
Pingback: The 12 Most Popular Pictures on Anne's Travels
Pingback: 12 Epic Hikes in the Western US, Pt. 2 - Anne's Travels
Pingback: Top 10 Pages on Anne’s Travels in 2014 - Anne's Travels
Pingback: 15 of the Best Day Hikes in Southern Utah - Anne's Travels
Pingback: Epic Day Hiking Road Trip to Southern Utah - Anne's Travels
Pingback: Hunger for God in the Wilderness - Anne's Travels