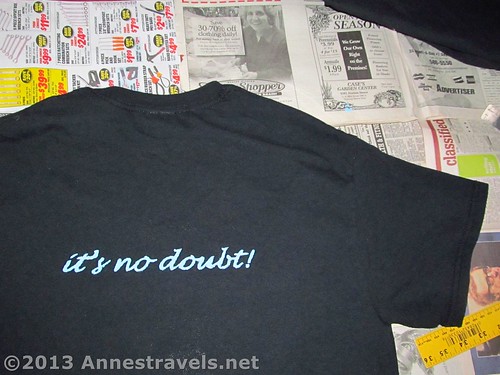
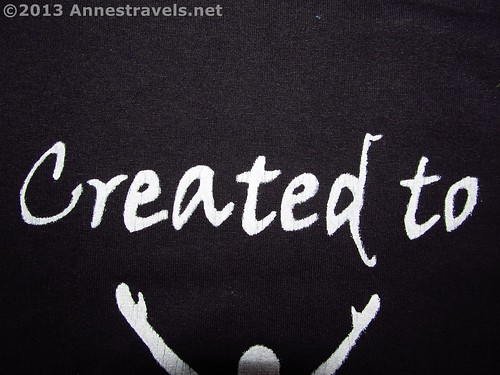
Racking your brain to figure out what to give a hiking buddy for Christmas? About five years ago I hit on a useful, yet inexpensive, solution: hand-painted, hand-personalized t-shirts (I usually spend about $25 to make 10 shirts). Not only are they tailored to the person receiving the gift, but they are also great for making an event special, keeping track of group members in crowds, and displaying a message you want to get across (after all, it’s likely you’ll meet plenty of other hikers on the trail). Over the years, I’ve used four different methods, which I’ll detail below with the pros and cons of each method.
(Affiliate links are present on this page.)
You’ll need the following supplies to make hand-painted t-shirts:
T-shirt (any size). I usually purchase t-shirts at Joanne’s or Hobby Lobby; both offer cheap (around $4/shirt – or on sale, as low as $2/shirt), durable, comfortable t-shirts in a variety of colors. Michaels and Walmart also sell t-shirts for similar prices (Walmart’s are in the craft department).
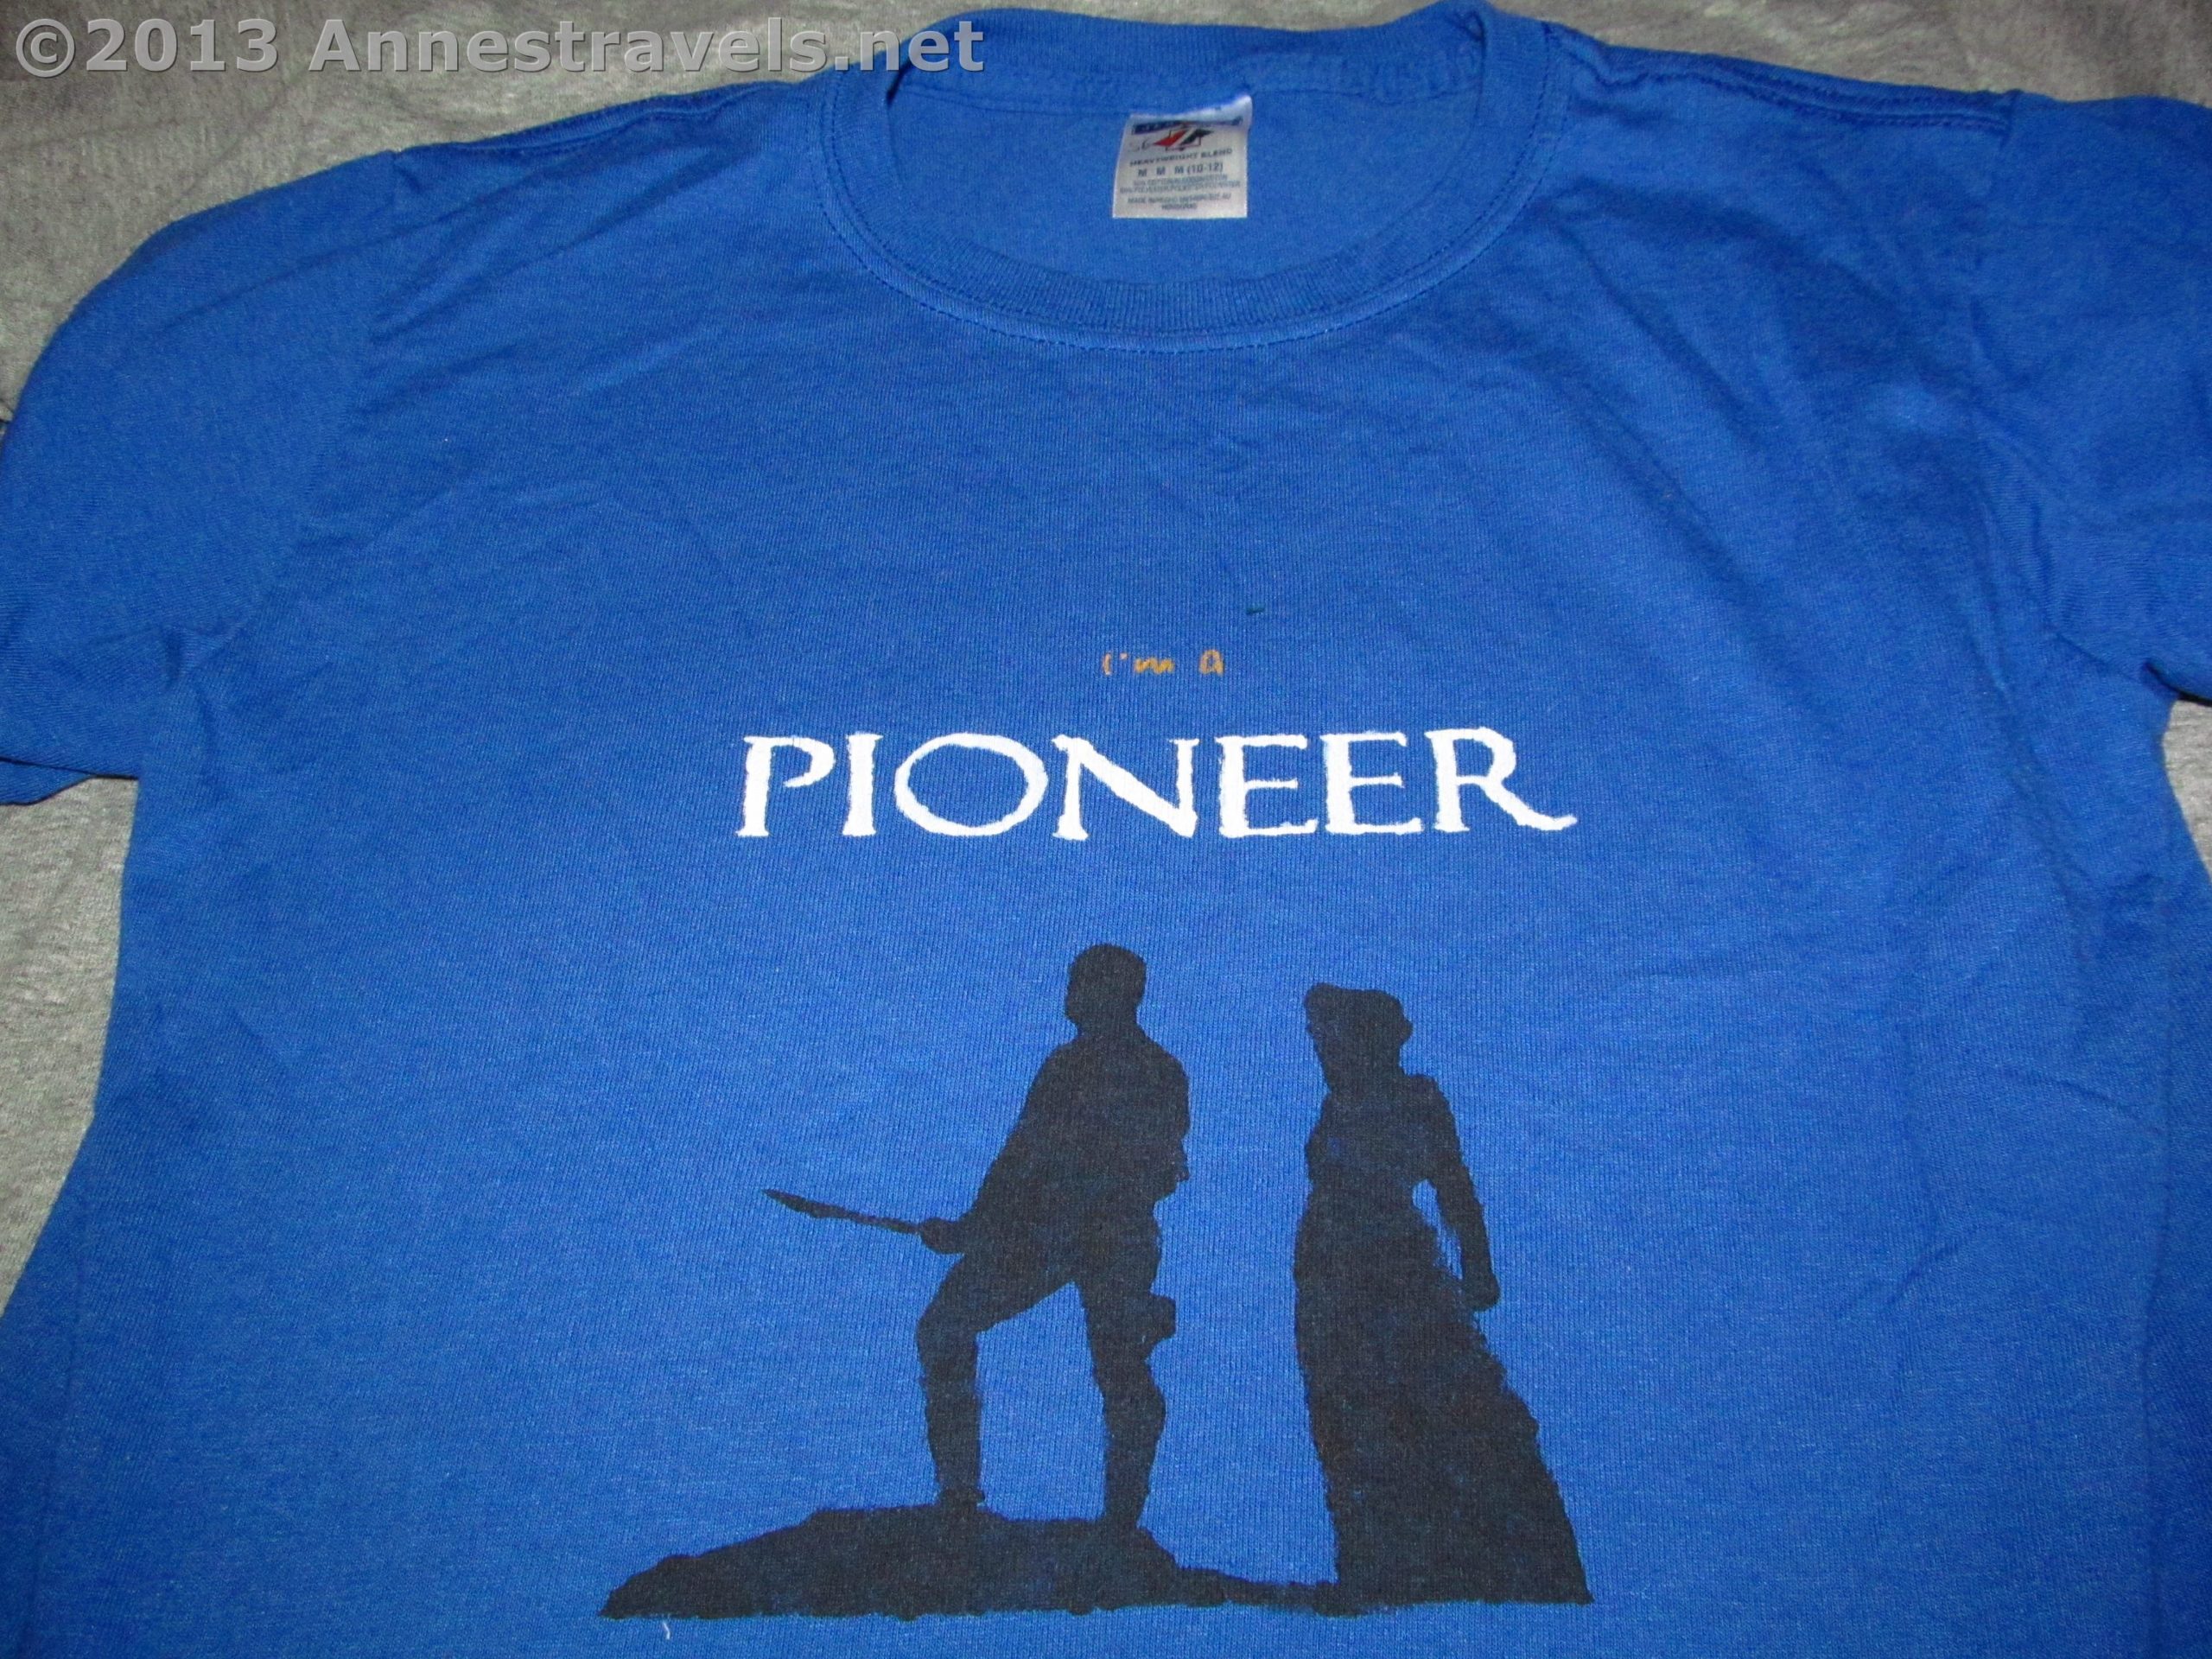
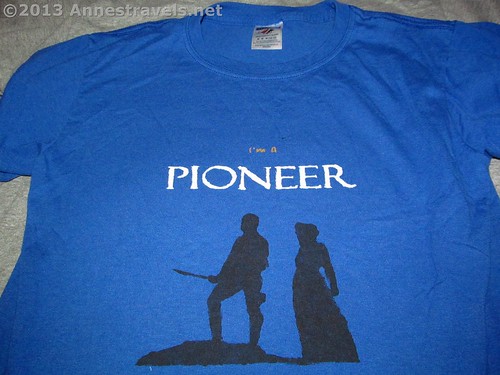
Pattern, which is the message, graphic, or whatever you want to paint on the t-shirt. I draw the graphics in Paint or Paint.NET (free) and then construct it with lettering in Microsoft Word simply because this program has rulers on the side so I know how big it will be when I’m finished. I think a real graphics artist would use Photoshop or Fireworks, but Word works for me 🙂 Make sure the pattern isn’t too big or too small – you want people to be able to read it from a distance away, but you also want it to fit on the t-shirt. You will need to print out this pattern (almost any home-printer is fine for this).
Acrylic Paint in your choice of colors. My t-shirts often have only one color, but you can use as many as you like. Your local craft store should have a wide variety of colors to choose from (Joanne’s has one brand that’s about $0.50/bottle).

Textile Medium. This is a must if you plan to wash the t-shirt. I forgot the first year, and, although we still wear the shirts, the design is pretty faded. I do not recommend using fabric paint instead of acrylic paint and textile medium – fabric paint is usually made to be spread in a thick line from the tip of a bottle. It simply does not work when applied with a brush. (Source: My (unfortunate) experience!) Textile medium is somewhat more expensive at closer to $3/bottle…but I’m still using two bottles we picked up somewhere along the way…about 50 t-shirts later!
Toothpicks or some other object to use when stirring the paint and the textile medium together.
Paintbrushes. In general, you can use whatever you have around, but if you want to do it right you should have something small enough to paint small lines and large enough to paint large sections (if necessary). My favorites are a ¼” flat brush or angle shader, a round brush (#3 Round 4000 Series American Painter Artist Paint Brush By Loew Cornell is a favorite), and a script liner for very small lines. You don’t have to spend a lot on paintbrushes; just try to get one with smooth-feeling bristles since these tend to wash out more easily than cheap, rough-bristled brushes.
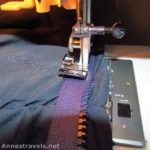
Large piece of cardboard (for example, a flattened cereal box) to put inside the shirt to keep the paint from leaking from the front to the back or vice versa while you’re painting.
Scotch-type tape
Additional supplies (for specific methods):
Stencil Methods:
Craft knife. The X-ACTO #2 Knife with Cap, Silver (X3602) is good.
Screen Printing Methods
Screen. I made mine out of an old gauzy curtain (you could make it out of almost any sheer or gauzy cloth) and a broken wooden baby gate. I cut the gate pieces to a size slightly bigger than my pattern, glued them together, then stretched the curtain tightly across the frame and stapled them in place with a staple gun. I’ve also used an old picture frame and the curtain. Professional screens are also available.
Squeegee. Anything with a long, flat edge could be substituted (I’ve seen people use a strong piece of cardboard, but I’ve never tried that). We happened to have an old squeegee (purchased in the cleaning department at Walmart) with the edge worn off so no one minded if I swiped it to paint with 🙂
Wax Paper (for Reusable Screen Printing only). I use the cheap stuff we happened to have in the drawer. Stiff paper could probably be substituted if you didn’t want to make too many prints.
Craft Knife (for Reusable Screen Printing only). Again, the X-ACTO #2 Knife with Cap, Silver (X3602) is good.
General Instructions for hand-painting t-shirts:
Prepare the t-shirt by washing it (without fabric softener) and drying it. Before washing, I put the initials of the person I’ll be giving it to on the tag – this is important if you’re making several sizes of t-shirts so you know whose is whose later. When dry, spread on a flat surface that you don’t mind getting paint on – I typically spread newspaper over my work area. Put the cardboard inside the t-shirt under the area you will be painting.
To mix the paint, use the directions on the textile medium bottle to determine the ratio of paint to textile medium you should use (if there aren’t any instructions, a 2:1 ratio of paint to textile medium is probably about right). Mix carefully but thoroughly with a toothpick.

Always wash brushes thoroughly, very soon after using. This will help ensure a long life for your paintbrushes.
I always test my stencils and screens on a rag first. This has saved me a couple times when there were issues with the stencil or screen and helped me perfect my technique before starting on the real thing.
After the paint is dry, wait 7 days (or number specified on the textile medium) and heat set by running in the dryer on high heat for 30 minutes or pressing with a hot iron for about 30 seconds. Do not wash until heat set.
Stencil Methods:
Stencil methods are more reliable than screen printing methods, but they’re also time-consuming and may not give the desired results.
Paper Stencil Method of Hand-painting T-shirts:
Pros of the Paper Stencil Method: Very reliable to get a good print; very straightforward to use (easy)
Cons of the Paper Stencil Method: “Lines” (see below) are awkward to work with and may leave undesirable lines behind, very time consuming to cut out the design
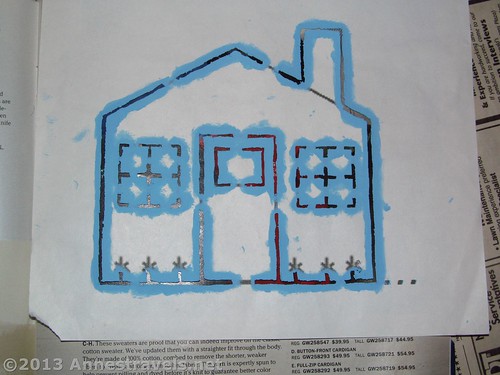
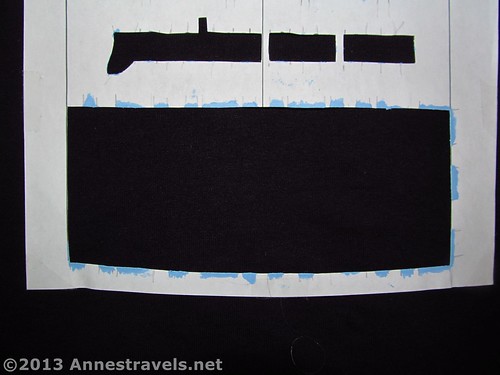
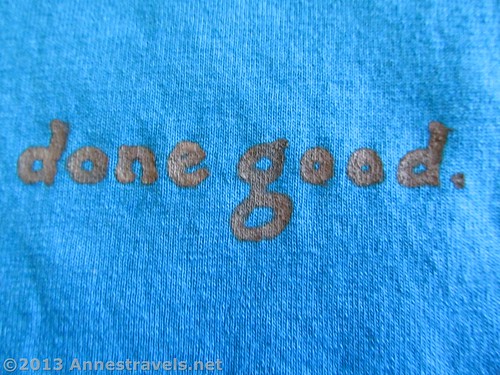
A stencil can be made by printing the pattern onto a sheet of thick paper, then using a craft knife to cut out each shape, letter, design, etc. Remember to leave lines, though, to hold together the inner parts of a design – for example, the inside of O’s, D’s, and so on (see the picture). Then lay the pattern on the shirt in the desired position and secure the corners of the paper with scotch-type tape. Mix together some paint and textile medium. Then take some paint on a paintbrush and run it across the places you cut out of the pattern. Be careful not to get too much paint around the edges; if there is too much paint it will run under the stencil and ruin the print.
After you’ve finished painting all the open areas (or at least all the areas of that one color), lift the pattern and fill in any lines that were covered by the stencil – for example, O’s, D’s, etc. This works best if done fairly quickly after the first layer of paint was stenciled on; otherwise, you may be able to tell later where the lines were. Go over each piece of the design again to even the color and make it look crisp. Let dry at least 2 hours, then repaint – this will give you a crisp, clear design on the t-shirt. If needed, let dry another 2 hours and repaint again. Heat set as directed.
Free-hand Stencil Method of Hand-painting T-shirts:
Pros of the Free-hand Stencil Method: No “lines” to deal with; very quick to cut out the pattern; if you’re artistic, it is very reliable to make an excellent print; only two coats of paint needed (instead of the typical three+ coats)
Cons of the Free-hand Stencil Method: Easy to mess up the print; time-consuming to paint even a small design; not for those who aren’t artistic (mind you, I wouldn’t call myself extremely artistic, but I can follow a general design as long as it isn’t complicated)
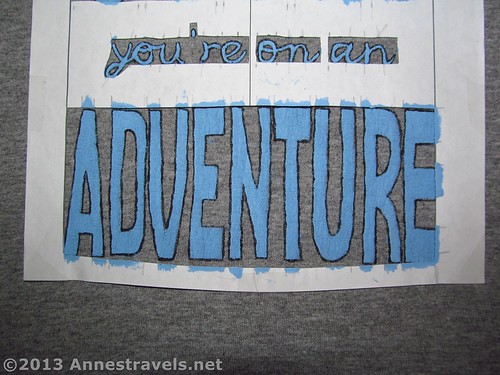
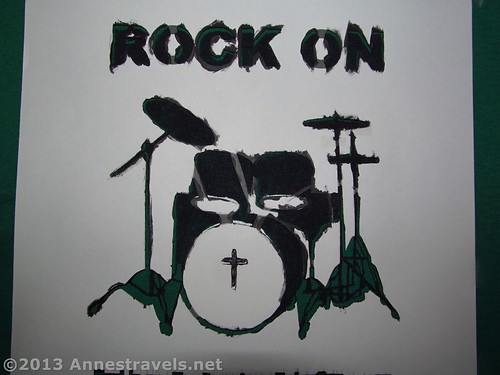
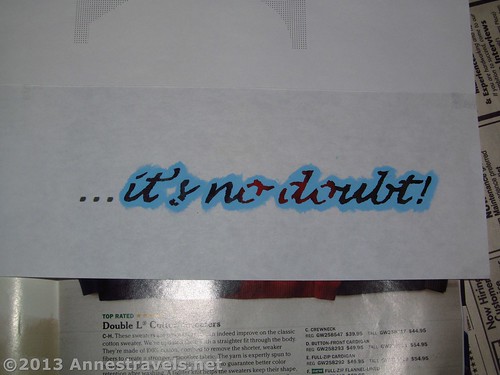
Tired of filling in all the “lines” left by the stencils, I developed another stencil method that is much faster to cut out and doesn’t leave behind the “lines”. Print out the pattern as before, but this time use a craft knife to cut around the words or designs – basically, you’re making yourself a stencil to show yourself where to paint not what to paint. Lay the stencil on the t-shirt in the desired location, securing corners with scotch-type tape. Mix paint as described above, then take the words you cut and, using these as a guide, paint each letter and design in the holes in the stencil. Let dry at least 2 hours; then repaint for a crisp, bright print. Heat set as directed. This method is good for very small lines (like all the stands on a drum set I painted once), but it’s not good at all for highly stylized fonts (unless you’re great at calligraphy!)

Screen Printing
Screen printing tends to be a bit faster than using stencils simply because you can swipe the squeegee over the print and have the initial pattern on the t-shirt in seconds. However, making the pattern is no less time-consuming and the speed at which you’re working increases the likelihood of making a mistake. That said, I love screen printing and don’t plan on going back to stencils any time soon 🙂
Permanent Screen for Hand-painting T-shirts:
Pros of a Permanent Screen: You can go back and make many more prints in years to come; fairly reliable prints; no “lines”; great for highly stylized fonts
Cons of a Permanent Screen: You can only use the screen for one pattern; very time-consuming/tedious to make
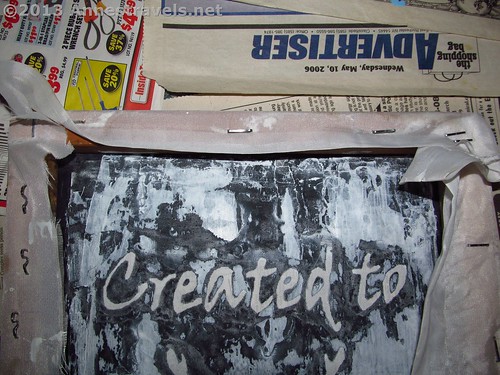
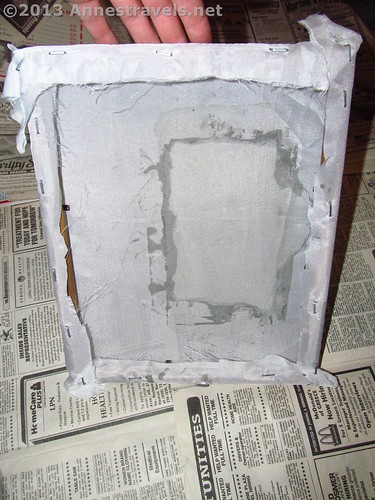
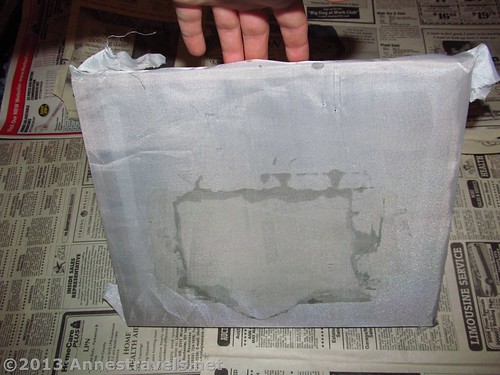
To make a permanent screen, take your constructed screen and tape the printed pattern to it – make sure that this is taped on the bottom of the screen with the printed side facing up toward the screen; otherwise, you’ll make the screen mirror imaged when you make the print. You want to be able to set the screen down as you’d do it when making the print and see the pattern as it should be (not mirror-imaged). Take some acrylic paint – no need for textile medium – and paint everywhere on the screen except where the pattern is – basically, you care creating a stencil in on the screen (see the picture). When it is fully painted, remove the paper pattern (if you don’t you may have to soak it off – no fun at all!) Let dry 24 hours. When fully dry, hold the screen up to the light and paint over any pinpricks of light outside of the design – basically, you want to make sure that no paint will get through except where the design is. Let dry fully, another 24 hours, before using the screen.
To use the permanent screen, lay the screen on t-shirt in desired position. Squirt some paint and textile medium onto the screen itself (outside & and above the design area) and mix carefully with a toothpick. Spread mixed paint across the upper end of the screen, just above the design. Take the squeegee and quickly yet carefully and firmly pull the paint down across the design to below the design area. It may take more than one swipe to get the entire design, depending on the width of your design and the width of the squeegee. Try not to leave globs of paint on the pattern as these can run outside the stencil on the screen if there is too much paint. As soon as possible, lift the screen off of the t-shirt and rinse the screen under running water to remove as much paint as possible. Then quickly return to the t-shirt to use a paintbrush to add another layer of paint on the print on the t-shirt (this helps ensure a crisp print; it also gives you a chance to fix any mistakes that may have occurred during the screen printing process). Let dry at least 2 hours, then paint once more for a crisp finish. Heat set before washing.
Reusable Screen for Hand-painting T-shirts:
Pros of Reusable Screens: Can be used for many different patterns and designs; not as tedious as permanent screens; can avoid using “lines”; likely the fastest method; I could go from one shirt to the next without letting the stencil dry in between
Cons of Reusable Screens: More likely to mess up a print; difficult to print the pattern; time-consuming to cut out pattern
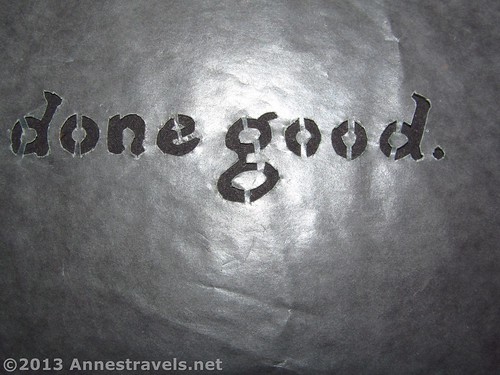
Cut a piece of waxed paper the size of your screen; tape it to a piece of paper and print the pattern onto it. (I found I couldn’t simply put the waxed paper through the printer, so this is why you must tape it to a real piece of paper.) Use dark colors or you likely won’t be able to see it. Remove the waxed paper from the paper and cut out the stencil, being careful not to smudge the pattern. You can cut out the middles of O’s, D’s, etc.; just make sure you save them. Tape the waxed paper to the bottom of the screen. Wet the screen slightly (with a little water) so you can stick the middles of the O’s, D’s, and so on in place. Set the screen carefully on the t-shirt, making sure that the loose pieces of the pattern are where they’re supposed to be (for example, the middle of your “g” hasn’t slid to one side).
Mix paint as described above on top of the waxed paper above your pattern. Spread the paint across the screen just above the pattern, then use the squeegee to pull the paint, carefully, firmly, and quickly across the pattern. This may take more than one pass; just try not to leave too much paint on the pattern itself and don’t use too much paint as this can cause leakage around the edges of the stencil. Lift quickly and carefully; make sure there is no paint on the bottom of the stencil and proceed to the next t-shirt. (This is the only method I’ve used that I went directly from one t-shirt to the next to the next without letting the stencil dry in between or immediately repainting the design for a crisp finish. My piece of waxed paper lasted about 9 prints.) When finished, immediately remove the waxed paper stencil and rinse the screen to remove excess paint. Let dry about 2 hours; then repaint for a crisp, clean finish. Depending on the color, you may need to let dry another 2 hours and apply another coat of paint. Heat set before washing.
So, I’m still contemplating what I want to say on this year’s t-shirts…but my hiking companions are already looking forward to them at Christmas. 🙂
This week’s featured product!
Not sure you want to make your own screen, buy a squeegee, and so on? This kit provides you with a screen, black screen printing ink, a good squeegee, and a craft knife for cutting out your pattern as well. Instructions in English, French, and Spanish.