

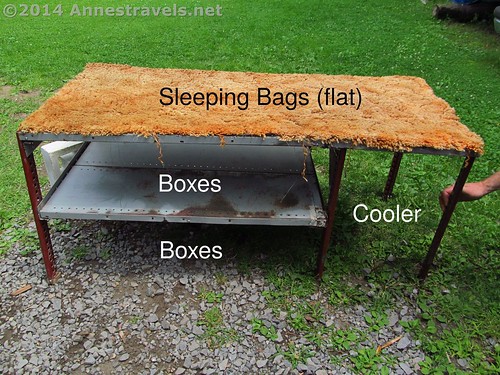
We’ve always packed in boxes. They’re so much efficient when it comes to space. But lifting and moving the boxes every time you need to get to something underneath was a bit of a pain. So when we moved from traveling in a station wagon to a van (one of the best moves we’ve ever made, I think) one of the first things we did was to build a shelving unit in the cargo space (behind the back seat) so we wouldn’t have to move so many boxes. Four boxes can fit on each shelf, so we only ever have to move a maximum of two boxes (the ones in front) to get to the one we you want. There’s also space for the cooler, and the sleeping bags (and van seat bunkbeds) all hang out on the very top shelf. Pretty cool, huh?
(Affiliate links are present on this page.)
What you’ll need to make your own:
Angle iron, pipe, or pieces from an old shelving unit for uprights – something strong enough to hold up the shelves and steady enough to do so without the shelf collapsing. Pre-made holes are a plus (and make the shelves more adjustable), but aren’t vital.
Shelving material – metal sheets that are thin and strong. I think we picked up ours along the side of the road (I don’t know how the scrappers didn’t get it first). I’ve also seen plywood used.
Reinforcements for the shelves – you don’t want the shelves bowing under the weight of several boxes, so you can attach reinforcements (piping or similar) under the shelves.
Braces, screws, nuts, etc. for attaching the shelves to the uprights.
Tools – something to cut metal with, something to cut your shelving material (will depend on the material you use), screwdriver or screw gun, wrenches, drill, tape measure, etc.
The first thing is to figure out the dimensions you want the shelves to be. I will illustrate with photos of our own shelving unit, but you’ll have to measure the space in your car, jeep, van, truck, SUV, etc. to determine your exact measurements.
Some things to think about when measuring and planning your shelves:
Give yourself a little leeway. You don’t want things crammed in so tight they almost don’t fit. Not only does this make it difficult to get things in and out, once you remove it you may never get it back in.
Measure exactly, write it all down, and measure again. You don’t want to discover when you’re half way through that the first measurement was 2 in. off!
Allow 0.5 to 1 in. headroom for boxes. We figured this out the hard way. After always struggling to get the boxes in and out, we finally rebuilt the shelving unit to give us a little more room between the top of the boxes and the next shelf (thus the wood blocks under the uprights in the pictures).
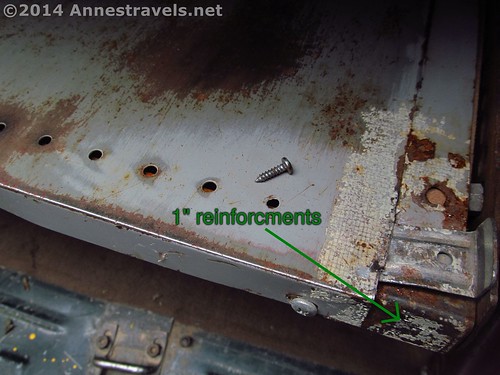
Remember to include the height of the shelves (and reinforcements). Most shelves will either have a lip or be an inch or so thick. Remember to include this in the height – a 12 in. box won’t fit in a 12 in. high shelf if there is a 1 in. lip on the shelf above (so the lip is only 11 in. above the shelf).
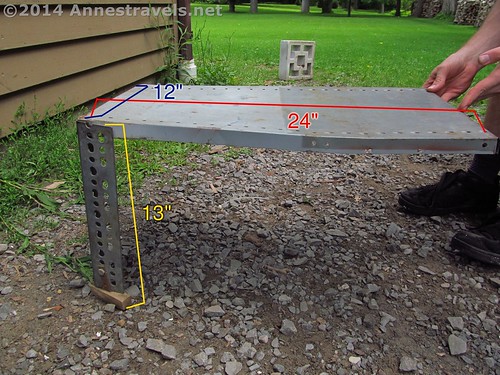
Here are the measurements for our full-size van using 11 in. and 14 in. paper boxes. A cinder block is holding up the back corner in this picture – it will sit on the wheel well when in the van.
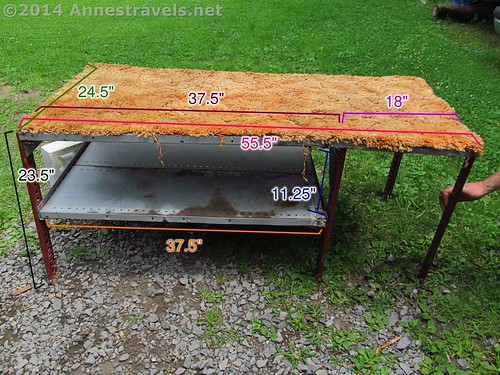
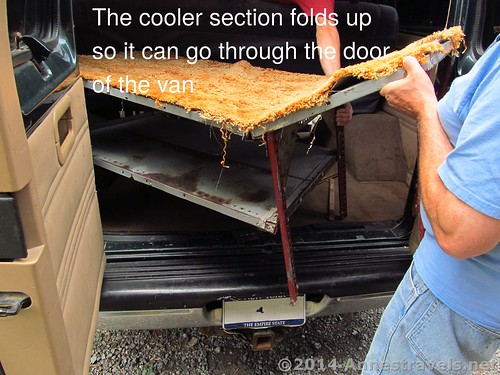
The top shelf is two pieces (we covered the top with carpet because sometimes someone sleeps on top of it – I did it for a while, it’s that strong). This is so the shelf over the cooler bends up so it fits through the door.
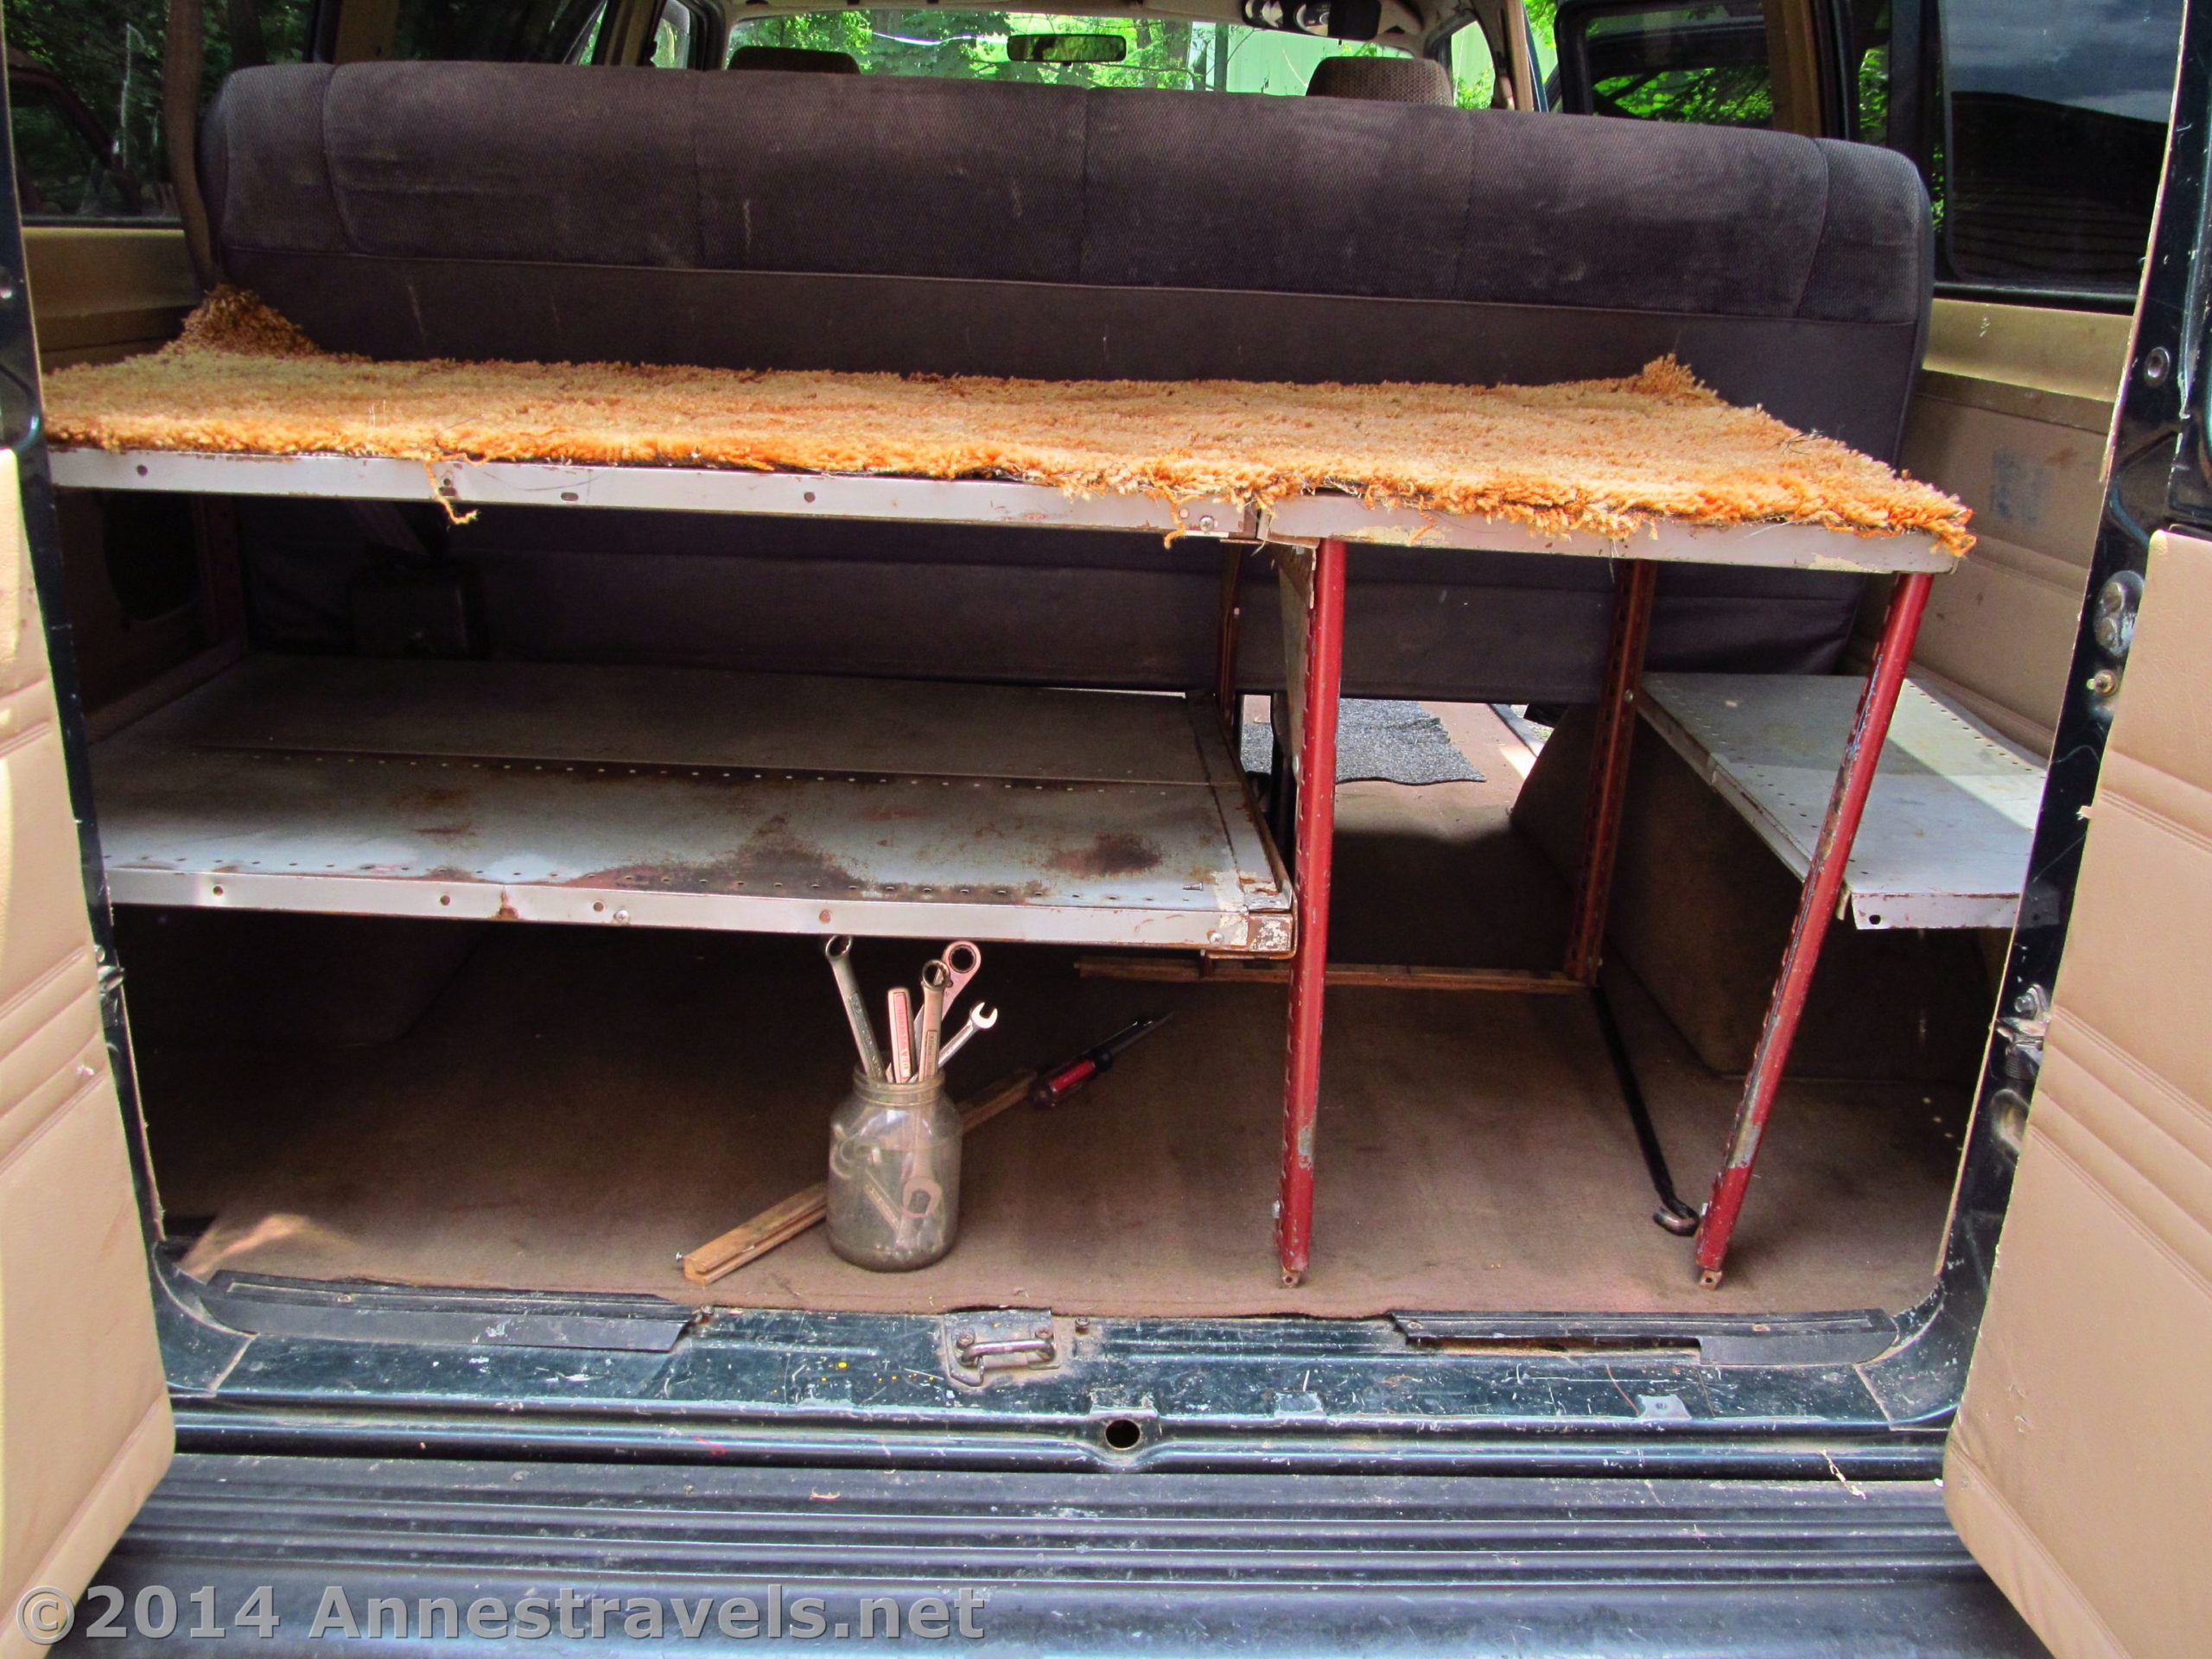
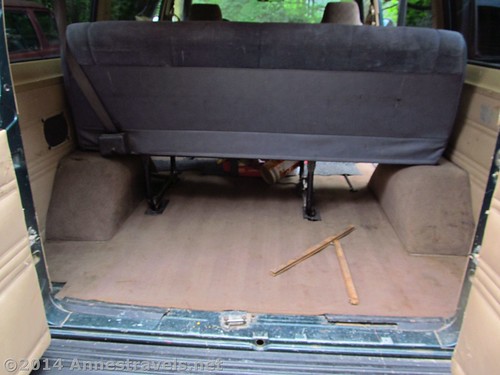
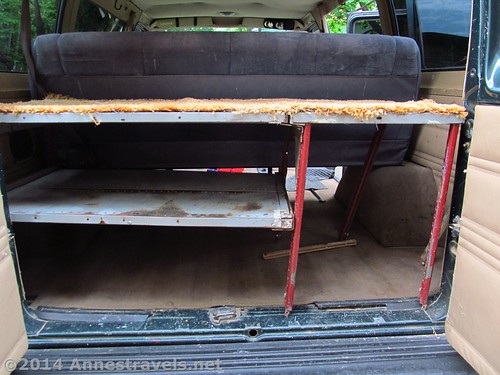
The back of the van, ready for the shelving unit
And in goes the shelving unit:
The first shelf in:
Use the pictures below to make your own shelving unit!
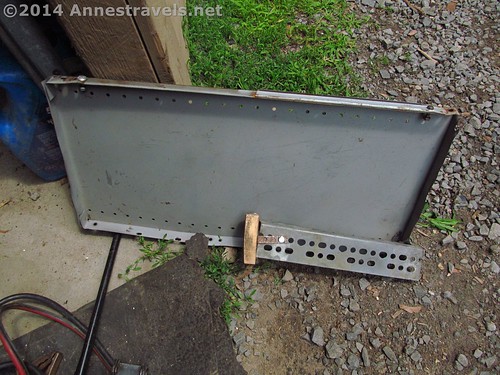
Here’s how the brackets look from underneath:
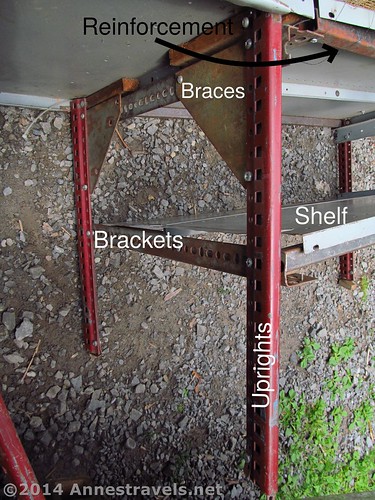
The reinforcements up close from the top:
The shelf unit is actually in two pieces – the main piece (that bends in the middle) and an extra small shelf. This small shelf uses the space between the wheel well and the back of the van by resting on top of the wheel well; an upright holds up the back. We usually can put a box on the top of it; underneath goes all kinds of stuff, from extra books for the trip home to the required shovel for wilderness camping!
The small shelf, collapsed on itself.
Now it’s set up (with measurements)
All the shelves in the van!
BTW – the wood on the bottoms of the uprights came from a redesign we had to make along the way. It would be better if you could just get it right the first time 🙂
Do you use something similar – or a little different – when you travel?
You can also sleep in the shelves – click here to find out how!
This Week’s Featured Product!
Looking to live in a van? This book tells you how, on only $20/day.


One response to “DIY Shelving Unit for The Back of a Van or other Vehicle”
[…] DIY Shelving Unit for the Back of a Van or Other Vehicle. ‘Way back in 2001, we made the first version of a set of shelves for the back of the van so we didn’t have to unload everything into the parking lot just to make supper. Several improvements later, this is how we make our own custom shelves for the back of the van! […]