
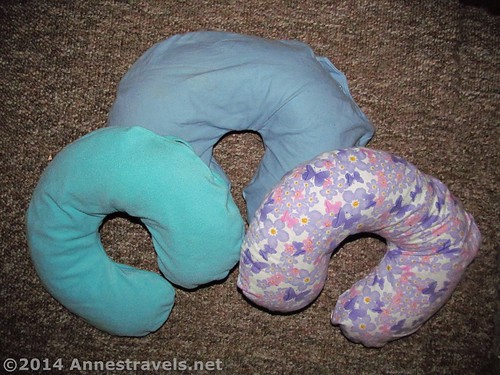
Adult-sized neck pillows
Recently, I’ve been making neck pillows. Several of us like pillows if we want to sleep during long drives (not the driver, of course), but usually we just use a rolled up jacket or whatever else we happen to be able to get our hands on at that moment (I’ve been known to use everything from window curtains to piling my hair under my head!). It occurred to me one day that if I made a real neck pillow, I’d be able to always have the right amount of “stuff” under my head (without using two jackets) and that would be a really nice thing! So since I was making one for myself, I started making them as gifts…for mother’s day…for father’s day… and if a recent trip was any indication, I’d say they went over pretty well! Since the van is a dirty place (and so are we after a week or more on the road), I decided to make a washable cover for the pillow. It may not look quite as pretty (it can turn out a little floppy), but, hey, at least I can wash it easily!
What You’ll Need to Make Your Own Neck Pillow
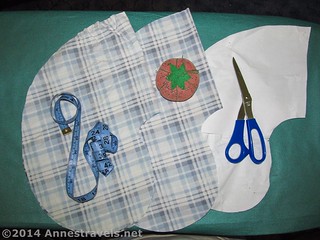
Some of the materials
Neck Pillow Pattern. (Many thanks to Dani for this – so as not to infringe on her copyright, I’ll just link to her pattern here. Click the image, the scroll to find the pattern. Or, click here to be taken directly to the pattern image.) Sadly, the pattern is no longer online. You can find the pattern on Pinterest here. You can also download the pattern and print it (below) – it should work with 8.5″x11″ or A4 paper. I don’t promise it’s perfect, but you should be able to figure it out…
About 1 yd. fabric; I like quilting cotton, but almost anything would work (I even used a piece of an old bed sheet at one point when I was pressed for time and materials – and it worked great!).
About 1 ¼ yd. soft fabric. I’ve used fleece and flannel with equally good results. Make sure it’s washable, though, or your washable cover won’t be very washable 🙂
Stuffing. I used Polyester Fiberfill, available at most craft shops. Since I was using partial bags, I don’t know exactly how much I used, but it was a lot. Plan on having at least a 12oz. bag on hand.
Closures. I used hook-and-eye fasteners, but you could use almost anything washable that will hold the two sides closed. I try to stay away from Velcro, though; let’s just say I’ve had my hair caught in the stuff way too many times! On my own pillow, I didn’t use closures at all…but that makes it look even less professional.
Matching thread
Sewing Machine
Sewing supplies (scissors, pins, hand needle, ruler or measuring tape)
Step 1: Laying out and Cutting Out the Pillow
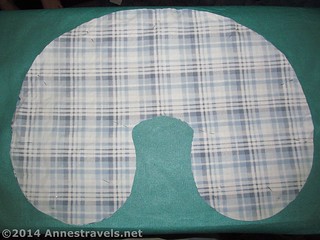
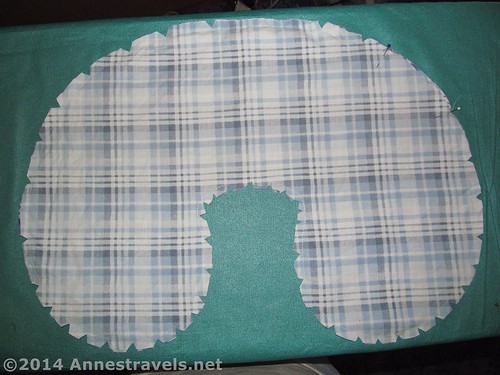
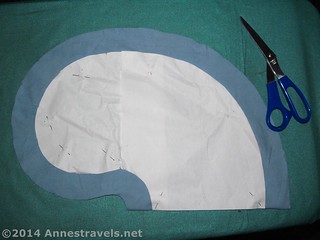
The cut neck pillow pieces, pinned
Start by laying out the pattern on the cloth. The easiest way to do this is to fold the cloth in half (like in the store), right sides together; then pin the pattern on the fold. Cut a second pattern on the fold, as well.
***Note*** I found the pillow to be a little lacking in height, so I added about a half inch around the pattern on all sides except the side on the fold. This seemed to work great for a fatter neck pillow! ***Update*** After using the pillows, I’d say the original pattern is the best size for most situations. So, think twice before making it bigger 🙂
Step 2: Pinning and Sewing the Pillow
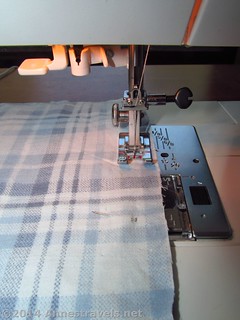
Sewing the pieces together
Pin the pieces you cut out, right sides together. They should be exact replicas of each other; if not, do your best to line them up as closely as possible and it should be ok.
Use the sewing machine to sew around all sides of the neck pillow, leaving about 4” open for stuffing the pillow. I used a ¼” to ½” seam allowance, depending on how strong I felt the fabric was.
Step 3: Turning the Pillow
The sewn and clipped neck pillow. The pins (purple and white) mark the area I left unsewn for stuffing and turning. I wouldn’t have wanted it any smaller!
Take the stitched pillow and clip the curves. “Clipping” is just snipping little triangles out of the seam allowances (don’t go through the seam!) in the curving areas (the tighter the curve, the more “clips” you’ll want to make). This will ensure that the seams lie flat and neat after you stuff it.
Then turn the pillow right side out. I found the easiest way to do this was to stick my hand right up inside the pillow and pull it right side out.
Step 4: Stuffing the Pillow
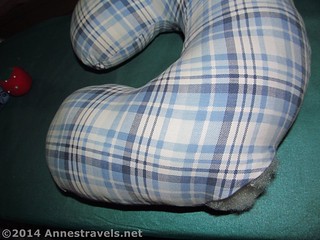
The neck pillow, stuffed and ready for the opening to be stitched shut
After the pillow has been turned right side you, stuff the neck pillow by taking small handfuls of the polyester fiberfill and sticking your entire hand through the opening, then pushing the fiberfill down to the very bottom of the pillow. Repeat until the entire pillow is very firmly stuffed (unless you like a less-firmly stuffed pillow).
Turn in the seam allowance of the stuffing opening and pin. This may be tricky if the pillow is well-stuffed! Hand-stitch the opening closed.
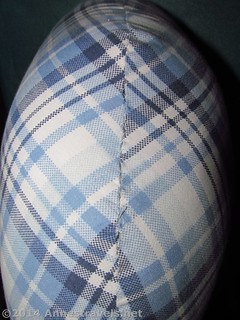
The opening, stitched closed. I’m almost embarrassed to admit I stitched it, but since I did, there it is. The good thing is that it will be hidden under the washable cover!
Congratulations! The pillow is finished! Now for the washable cover…
Step 5: Cut the Cover Pieces
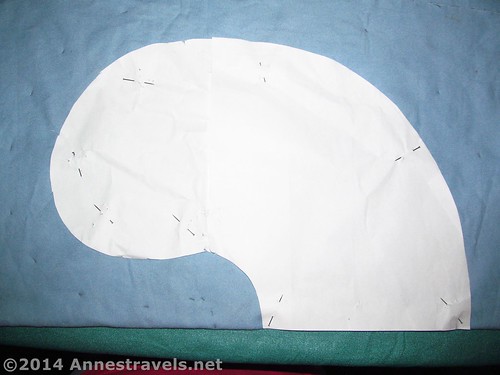
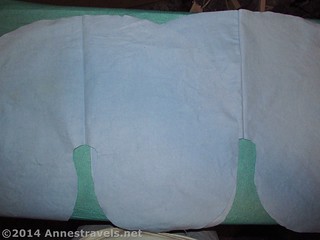
The neck pillow cover, traced onto the flannel fabric (if you can see the pencil marks!)
The cut neck pillow cover
Cut the cover pieces exactly as for the neck pillow, EXCEPT make the pieces a generous ½-3/4” larger on all sides (except where the piece meets the fold – the straight edge) than the original pillow (the smaller the excess, the less floppy the cover will be, but it will also be much harder to stuff the pillow inside the cover!) I used the same pattern piece, and marked the extra with a pencil on the cloth…I know, not professional, but it does work if you’re too lazy to make another pattern piece 🙂
Step 6: Pin & Sew the Cover Pieces
The pieces, ready to be stitched
Pin the cover pieces, right sides together, matching all edges (especially the curves). Use the sewing machine to stitch around the entire outside (at ½” seam allowance) except for about 6-8”, which you’ll want to leave open for inserting / removing the pillow.
Step 7: Turn the Cover Right Side Out
Clip the curves (less so than for the pillow – keep the clips well away from the stitching) and turn the cover right side out. Take a thin object, such as a short ruler or pencil with broken lead, and run this along the inside of the pillow along seam lines. This should help the cover with the final “turning out”, so the seams are flat and finished-looking. Iron if the seams simply will not turn right side out and look good.
Step 8: Finishing the Cover
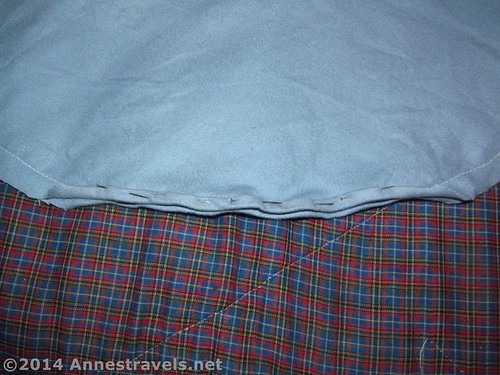
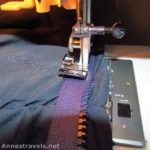
Hemming the opening
Turn the open edges under ¼” and then under ¼” again. Press. Essentially, you’re going to hem the opening so it doesn’t fray. Pin, then sew by hand or on the sewing machine (I used the sewing machine).
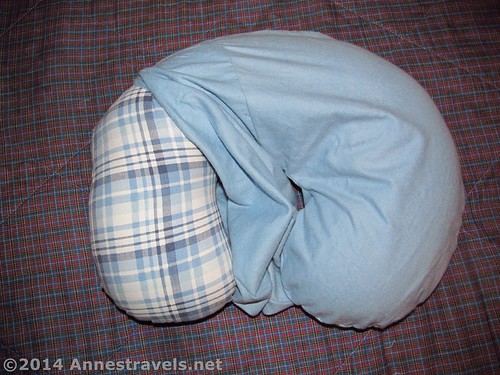
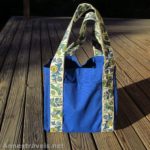
Stuffing the pillow into the cover. I made this particular cover a little big, so it’s extra floppy. I fixed that in the directions, though.
Stuff the pillow into the cover via the opening with the now-hemmed edges. Then position your closures to best close the opening while not being in the way for the sleeper / get caught in your hair / etc. Attach the closures – if you’re sewing, either use extra caution not to catch the pillow, or remove the pillow before sewing.

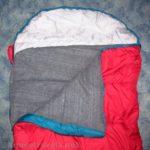
Almost done!
To wash, simply unhook the closures, pull the pillow out of the cover, and toss the cover in the laundry (laundering via the cloth’s specifications, of course!)
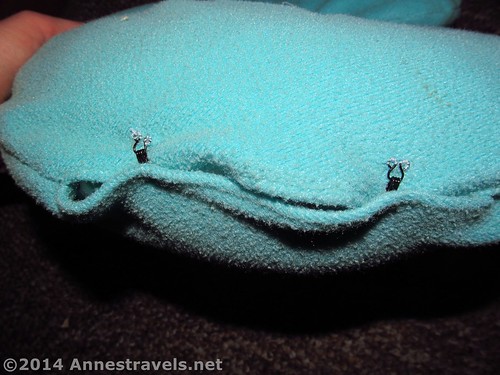
The stitched closures
Congratulations! Your neck pillow with its washable cover are finished!!!
This Week’s Featured Product!
If you’d rather buy a neck pillow, this one has multiple colors to choose from!


These are great! I’d love to make one for myself, since I have a hard time finding a neck pillow that is tall and narrow enough for my neck. How tall would you say your pillow are (original and/or altered pattern)? I need to figure out how much to adjust it. Thanks!
Hi froghazel, the normal pattern turns out to be about 4.5 in. tall when all was said and done if I stuffed it very firmly. I gave the larger pattern away as a gift – but it was a little taller, maybe closer to 5 or 5.5 in. If I didn’t stuff as firmly, it’s more like 3 in. Hope that helps!
Pingback: The Best of Anne's Travels in 2015 - Anne's Travels
Pingback: Top 10 Pages on Anne’s Travels in 2014 - Anne's Travels